Chicken with leeks and sour cream

Ah!  Chicken and leek, a match made in heaven, or possibly somewhere in France that Maggie and I haven’t visited yet.

This is our favourite cold-weather chicken dish. There are several steps in the recipe but it’s not too complicated. The fresh thyme is an essential ingredient for achieving the best result, which has elegant textures and flavours. A wine companion? Try a subtle chardonnay, Chablis perhaps, or Sancerre, how Sauvignon Blanc was born to be used.

Ingredients

1½ kg of chicken pieces (we use skinless chops – thighs with one bone removed – and middle wing segments, the latter being important for texture)
1 tbsp olive oil
40-50g butter
salt & pepper
2 sticks of celery, coarsely sliced
8-10 French shallots, peeled and halved
1-2 leeks, chopped
3 cloves garlic, chopped
80ml of brandy
¾ cup chicken stock
2-3 sprigs of fresh thyme
1 bay leaf
2 tbsp sour cream (crème fraiche)

Method

  1. Preheat oven to 160C.
  2. Add oil to a warm roasting pan, add pieces of chicken in one or two batches and roast for 20 minutes, turning after 10 minutes. (This procedure browns the chicken pieces evenly and leaves your cooktop un-spattered!) Remove to a dish and season with salt and pepper.
  3. Heat butter in a heavy based, flame-proof casserole, large enough to hold all the ingredients. Add shallots, leek , garlic and celery to the heated pan and saute for 8 minutes over gentle heat. Add herbs and chicken pieces to the pan.
  4. Add brandy and cook for a couple of minutes to reduce. Add the chicken stock and bring to the boil.
  5. Place lid on casserole, then transfer to the oven and bake for ¾ to 1 hour.
  6. Remove from the oven, remove the chicken pieces and transfer to a warm serving dish. Remove herbs.
  7. Cook sauce in casserole over a medium heat on the stove and reduce slightly before adding the sour cream and cooking gently for a few minutes. Check for seasoning, thicken to suit and pour sauce over the chicken to serve.

Chick casserole 1   Chick casserole 2


Ready to eat

Ready to eat

Posted in Cooking | Tagged , , , | Leave a comment

Chestnut & ricotta ravioli with lamb ragu

It has been chestnut season here in Victoria and we recently bought some beautiful fresh chestnuts at Toscano’s, our favourite supplier of fruit and vegetables.

Many of the chestnuts available in Melbourne are grown in the north-east of Victoria, where Italian migrants settled many decades ago and began to grow plants and animals in accordance with their own traditions. (Some of them used to grow tobacco too but, thankfully, that has been replaced with Italian grape varieties such as Sangiovese.)

Our main source of ideas on how to cook with chestnuts is Patrizia Simone (I mention her book in the page on ‘Sources of recipes and cooking advice’). Patrizia and her husband George migrated from Umbria early in their married life and eventually settled in the same district as the chestnut growers, etc. Her eponymous restaurant is famed throughout the land, although her son has now taken control while Patrizia and George enjoy a more relaxed semi-retirement.

The first recipe we tried, early in chestnut season, was for ricotta and chestnut gnocchi with hazelnuts, sage and brown butter. We had to modify the method a little – sometimes there is a world of difference between what works in a commercial kitchen and what works at home – but the result was delicious. We will make it again soon, incorporating some further modifications; I will put up a post, including some photos.

Last week, we used Patrizia’s recipe for chestnut and ricotta cappellacci with lamb ragu. The chestnuts were at their peak with lots of ripe, earthy flavour. For this dish, they are first roasted but for less time than usual so the flesh stays firm. Then they are cooked in milk with some rosemary leaves and fennel seeds until they are tender; the cooked nuts are mashed with some ricotta and seasoning to make a filling.

In her recipe, Patrizia fills the pasta by hand. There is a good reason for that, as we discovered when we tried to put the filling into ravioli using our pasta machine. The filling was a bit dry for this method, so the machine struggled to fill the ravioli fully. For the second batch, shown on the right of the photo, we added a little milk to the filling and it worked pretty well, enough to encourage us to do it again next season.

Ravioli 1   Ravioli 2

The ragu was relatively simple – just some beautiful diced lamb from Ashburton Quality Meats, trimmed flat pancetta, garlic, a glug of white wine and a generous amount of tomato passata. The result was delicious and the leftovers yielded a workday-lunch for each of us.

There was some ricotta leftover, we had some creamed cheese in the fridge and some cooking apples in the fruit bowl, so I suggested we make a cheesecake according to a favourite recipe of mine in the Australian Women’s Weekly Italian Cookbook. It is made in a sweet, lemony shortcrust pastry case lined with slices of apple; mixed peel and chopped raisins are added to the filling to add further complexity (today’s euphemism for “is it okay to have a second slice?”).

All in all, a very satisfying afternoon in our kitchen.

Cheesecake

Torta di Mele alla Panna

Posted in Cooking | Tagged , , , , , , , | 1 Comment

Stuffed boneless shoulder of veal

Of all the new veal dishes we produced in 2012, this is my personal favourite. The combined flavours of the stuffing ingredients are very moreish.

However, we made a couple of mistakes when we cooked this dish a few days ago. This season’s batch of stock had more salt than previously – big mistake! Over the two hours of cooking, the flavours of the stock became more concentrated, including the salt.  And this piece of veal – purchased from Ashburton Quality Meats – weighed only 750g and was more tender than some we have cooked. So, it was overcooked; nothing wrong with the flavour but the meat fell apart as Maggie carved it and it was slightly dry.

To serve the leftovers – enough for a take-to-work lunch each – I ameliorated the saltiness of the sauce by making some barely-salted carrot mashed with butter, sour cream and nutmeg, as well as adding some wilted spinach leaves to each plate.

There are some other veal dishes on our prospective menu, so we are going to have to be very circumspect with the use of salt.

Ingredients

40g butter
125g mushrooms
1-2 shallots, peeled
4-6 slices of flat pancetta, roughly chopped
3 tsp chopped, fresh herbs (we use a mixture of parsley, sage, thyme and marjoram)
pinch of mixed spice
salt and pepper
1kg boned shoulder (or breast) of veal
1 tbsp olive oil
200ml veal stock

Method

  1. Finely chop the mushrooms and shallot, melt 20g of the butter and sauté for a few minutes to soften the vegetables.
  2. In a bowl, combine the mushrooms and shallots with the pancetta, herbs and mixed spice. Add salt and pepper to taste.
  3. Lay the veal flat, skin-side down, spread with the stuffing and roll up into a sausage shape. Use kitchen string to tie securely.
  4. Melt the oil and remaining butter in a heavy flameproof casserole and brown the veal lightly. Add stock, cover tightly and cook in an oven pre-heated to 150C for about 2 hours or until tender, turning the veal once or twice.
  5. Place the veal on a board, remove string and carve slices to serve, accompanied by the cooking liquid, some or all of mashed carrot, boiled small potatoes, wilted spinach and beans.

Veal stuffed 2   Veal stuffed 3


Veal stuffed 4   Veal stuffed plate

Posted in Cooking | Tagged , , , | Leave a comment

Braised duck with a red wine sauce

As I have said before, Maggie and I are very fond of duck and it is a rare month when we don’t cook a duck meal to enjoy at home. Sometimes, we even share it with friends!

I have met many persons who like to eat duck but never actually cook it for themselves, or not unless it is purchased ready to heat and eat. Duck seems to have some sort of aura that intimidates otherwise competent home-cooks.

To us, the secret is to begin with recipes that make sense, follow them carefully, reflect on the results and keep practising. Walk through that door and a culinary paradise will be yours!

Here is the latest recipe we have added to our list of favourites. Tasty and colourful!

Duck plate

Ingredients

2 premium quality Duck marylands (we bought flavoursome corn-fed duck from Cester’s at Prahran Market)
½ tsp salt
2-3 cloves
1 cinnamon quill, broken into 4 lengths
1 orange
1 French (brown) shallot, peeled and roughly chopped
2-3 cloves of garlic, peeled and finely sliced
½ stick celery, roughly chopped
½ medium carrot, roughly chopped
½ cup dry red wine, ¼ cup tawny port
150ml chicken stock
olive oil
2 small sprigs of thyme

Method

  1. Rub salt into the skin of the duck. Place marylands flesh-side down in a dish and scatter spices around the duck.
  2. Carefully remove the zest – no pith – of the orange with a potato peeler and reserve. Remove the pith roughly with a sharp knife, then cut the flesh crosswise into six slices. Place orange slices on top of marylands, cover and marinate overnight.
  3. Heat the wine, port and stock in a saucepan and simmer, uncovered, for 10 minutes to reduce the volume.
  4. Remove duck from refrigerator one hour before cooking and discard marinade ingredients. Place a heavy-based non-stick pan over medium heat. When it is quite hot, place the marylands skin-side down in the pan and sear for 5 minutes. Turn and sear the flesh side for 5 minutes. Turn again, remove from heat and, when the pan has cooled, transfer the duck to a plate.
  5. Heat oven to 160C.
  6. Return the pan to medium heat, add a splash of olive oil to the pan juices, add the vegetables and fry for 5 minutes to soften them. Transfer the vegetables and the thyme to an oven-proof dish, place the marylands skin-side up on the vegetables, pour in the wine-stock liquid, cover and bake for 45 minutes to one hour, until duck is tender.
  7. Transfer duck to a small baking dish and return to oven for 10 minutes.
  8. Meanwhile, strain the vegetables from the liquid, pressing down to extract as much sauce as possible. Use a soupspoon or similar to remove most of the rendered duck fat and oil from the surface of the strained sauce.
  9. Add the sauce to the pan, add the orange zest, bring to the boil, adjust seasoning and simmer, uncovered for 5 minutes. Strain to remove the zest. The sauce is ready.

We serve the duck sitting on a bed of herbed brown rice (see Love that duck post and use ½ cup of rice), a side dish of baked carrot and beetroot (instructions below), with the sauce poured over the duck.

Duck maryland 1   Duck maryland 3

Duck maryland 4   Duck maryland 5

Carrot and beetroot parcel

This is a lovely side dish for roast poultry; even roast beef. Make a parcel with foil and line the base with baking paper. Add pieces of peeled carrot and beetroot. Add a splash of white wine, a knob of butter, a glug of olive oil, seasoning and sprigs of thyme. Seal the parcel and bake for about 40 minutes.

Posted in Cooking | Tagged , , , , | Leave a comment

Twice-cooked goat with fresh herbs and a piquant sauce

Many Australians not of Mediterranean descent would have grown up thinking of goat as a meat that could be used for making a spicy dish in the tradition of the Indian sub-continent. Until recently, that was certainly my assumption but the emerging popularity of cuisines such as Spanish and Moroccan has introduced me to ways of cooking goat that better suit the culinary inclinations in our kitchen. At the same time, there has been an increase in the availability and quality of goat meat, at least in Melbourne.

Maggie and I  have cooked goat a few times, initially in a spicy dish and then, with more success, using a recipe for a Spanish style of dish.  In 2012, we bought Patrizia Simone’s wonderful book, My Umbrian kitchen, and tried out her goat recipe. The result was quite agreeable but, for our second attempt, we made several modifications that refined it to produce a dish with show-offs’ dinner-party qualities.

Goat plate

Ingredients

1.5kg pieces of shoulder of kid on the bone (ours was supplied by Cester’s at Prahran Market) (this will be enough to feed four persons)

Marinade:
6 cloves garlic, roughly chopped
1 bay leaf, cut into four pieces
2 sprigs rosemary, leaves removed and chopped
small handful sage leaves
a few fronds of wild fennel
125ml olive oil
200ml dry white wine
½ tsp caster sugar
½ tsp each of salt and pepper

Cooking:
100g butter, softened
2 handfuls of fresh herbs (thyme, parsley, sage, rosemary, mint, tarragon), finely chopped
salt and pepper
1½ cups of chicken stock
1 cup tomato passata
1/8 tsp chilli flakes or 1 whole red chilli

Method

  1. Combine marinade ingredients in a large flat-bottomed ceramic dish, taste the marinade and adjust seasoning and oil/wine balance. Add goat pieces, turn pieces to coat thoroughly, cover tightly with cling wrap and refrigerate for up to 48 hours.
  2. When you are ready to cook the goat, remove dish from refrigerator one hour before cooking and, 45 minutes later, heat oven to 175C. Remove each goat piece from the marinade, brush off garlic and herbs and place on a platter.
  3. Place half of the goat pieces in a roasting pan and bake in the oven for 20 minutes, turning after 10 minutes. Transfer goat to the platter. Repeat with remaining pieces of goat. Reduce oven temperature to 150C.
  4. Combine butter, chopped herbs and a generous pinch of salt and pepper to make a thick paste. Rub the paste into the surface of the goat meat, ie not the bones, etc.
  5. Place the goat pieces in a casserole dish wide enough to fit them snugly in one layer. Add the stock and passata, cover and cook in the oven for between 1½ and 2 hours, depending on how long it takes for the goat to become tender. Turn the meat once or twice during the cooking and reduce the temperature slightly if the liquid is bubbling too briskly.
  6. Increase the oven temperature to 175C, transfer the goat pieces to a roasting pan and bake for about 10 minutes to caramelise the meat.
  7. Meanwhile, strain the cooking liquid into a saucepan and use a soup spoon to remove most of the fats on the surface. Reduce liquid briefly and thicken slightly with cornflour. Serve goat pieces with your preferred side dishes – we would choose some of potato, carrot, peas and beans – then ladle the sauce over the goat.

The first photo shows the pieces of goat ready to be roasted the first time. The second photo shows the braised goat ready to be removed and roasted briefly while the sauce is made.

Goat 1   Goat 2

Posted in Cooking | Tagged , , , , | Leave a comment

Cooking with veal

Most Australian meat-eaters cook regularly with some or all of beef, lamb, pork and chicken; far fewer prepare dishes using cuts of veal. In our experience, this is either a matter of taste – some find veal bland – or a lack of experience or confidence.

Maggie and I have both cooked with veal for decades. However, our shared repertoire was quite narrow and we decided early in 2012 that we would like to extend it, while learning new techniques and adding some cuts of veal with which we were less familiar.

So, we had a chat to our butcher and bought a calf. While we were waiting for a quality calf to arrive, we scoured some of our cookbooks for recipes we might like to try. We already had a few favourites – osso bucco, loin chops braised with leeks and veal parmigiana; we had also made vitello tonnato a couple of times. Fresh inspiration came from four books: the French cookbook mentioned in my Coq au vin post and books written by three Australian writers – Stephanie Alexander, Beverley Sutherland-Smith and Maggie Beer).

Our research helped us to guide our butcher as he broke down the carcass into various cuts. We took our calf home, chose a recipe and cut for our first dish, set aside some bones to make stock and put the rest in the freezer.

The recipes for the dishes that we cooked and enjoyed enough to do a second time were added to our in-house publication of favourite recipes. This season, we will be preparing some of these dishes once again and I will share recipes and photos as we proceed. However, I will begin with our latest veal dish, inspired by our recent travels in Europe.

TGV (tasty gourmet veal) meatballs

Maggie and I travelled by train from Dijon to Salzburg to begin the second week of our travels. The journey took about 9 hours and we supplemented the sandwiches we had bought at Dijon’s train station with a serve of veal meatballs from the train’s kitchenette. They were just delicious, and quite different from the very tasty Italian style of veal (and  pork) meatballs. Once we were home, we modified an online recipe to prepare something that matches our palate memory. We have named it in honour of the TGV (Train Grande Vitesse) that reached a maximum speed of 308kmh during our journey!

image

Ingredients

10g butter
1 medium red onion, finely chopped
1 cut-for-toast slice of dense bread, crusts removed, torn
25 ml milk
500g minced veal
1 tsp Dijon mustard
¼ tsp mixed spice, ¼ tsp ground nutmeg
1 egg
salt and pepper
a little extra butter
1 clove of garlic, finely sliced
6-8 button Swiss Brown mushrooms, thinly sliced
1 cup of chicken stock
olive oil for frying
¼ cup cooking cream

Method

  1. Melt butter over gentle heat and sauté the onion for 5 minutes. Remove from the heat.
  2. Place bread in a mixing bowl. Add milk and stand for 5 minutes. Add mince, onion, mustard, spices and egg, and then season generously. Mix to combine well then refrigerate mixture for 30 minutes.
  3. Add stock, garlic and mushroom to a saucepan, bring to the boil and simmer for 15 minutes to extract flavours. Strain, pressing with a spoon, and reserve the stock. (This step is optional but it does add to the richness of the sauce.)
  4. Roll level tablespoons of the mixture into balls (you should produce up to 20 meatballs).
  5. Heat a little olive oil in a non-stick pan and brown the meatballs well in 2-3 batches, depending on the size of the pan (don’t crowd the pan or the meatballs will stew). Reserve the meatballs in a dish in a warm oven.
  6. Add stock to the pan juices, bring to the boil and simmer for about 10 minutes to thicken and darken the sauce. Add the cream and cook for 3 minutes. Add the meatballs, cover with a lid and simmer for 2-3 minutes.
  7. You could serve the meat balls with some herbed brown rice and a salad of green leaves or some pieces of kipfler potato, Dutch carrots and fresh beans or peas.

Veal meatballs 1   Veal meatballs 2Veal meatballs 3   Veal meatballs 4

Posted in Cooking | Tagged , , , , | Leave a comment

Maggie’s garlic prawns

A caricature of how we work in the kitchen might portray me as the creative tyrant and Maggie as the expert-but-oppressed kitchen hand. However, Maggie would like it to be known that she has several specialities of her own, albeit with input from me on sauces and seasonings (two of my main strengths as a cook).

Maggie’s version of garlic prawns is one of her most popular creations, producing an elegant dish that is a far cry from prawns that have been ruined by too much garlic or olive oil. (I have an old-but-vivid olfactory memory of a restaurant in Subiaco, an inner-suburb of Perth. The most popular item on the menu was garlic prawns, served in a cast-iron pot, knee-deep in a pool of olive oil thick with a sludge of crushed garlic. It seemed like all good fun at the time, except for the fact that the restaurant’s walls and timbers reeked of rancid oil and garlic!)

Ingredients (to serve 4 to 5 persons as an entrée or 3 as a main course)

30g butter (can substitute some olive oil)
24 raw medium prawns, peeled and halved lengthways
6-8 cloves garlic, crushed
generous pinch of chilli flakes
½-¾ cup lite cooking cream (to suit your palate)
< ½ bunch parsley, chopped
salt and pepper
¾ cup Basmati rice, boiled with a generous pinch of saffron threads

Method

  1. Melt butter (and oil) in large non-stick pan over medium heat. Add prawns and cook, turning each prawn once, until the prawns just begin to colour.
  2. Add garlic and sauté for 2 to 3 minutes, stirring occasionally. Add chilli flakes and stir.
  3. Add cream and cook sauce gently until it thickens a little. Add parsley, season generously and stir to combine ingredients.
  4. Serve immediately in flat-bottomed pasta bowls, alongside or on top of some of the saffron rice. I like to serve a simple side-salad of tomato wedges, chopped basil, olive oil and balsamic vinegar.
  5. Any leftovers re-heat effectively in a microwave oven at no more than medium power.

Garlic prawns 1   Garlic prawns 2

Posted in Cooking | Tagged , | 2 Comments

A dish to crow about?

This could be a long, slow-cooked post but that’s only fitting. After all, it took Maggie and I three days to turn a rooster into a meal of my favourite poultry casserole – Coq au vin!

First, some personal, historical context. For Christmas 1985, good friends 0f mine – yes, Susan, it was you and Bill – gave me a French cookbook and, in doing so, expressed the hope that they would have the opportunity to share some dishes prepared using the book’s recipes.

Bad timing!

A few months later, I began to live with a vegetarian (the mother of my son). All meat except fish was off the menu … until she developed a craving for chicken during the pregnancy. So, we ate chicken occasionally, either a roasted whole bird from a fast-food outlet, supplemented by fresh home-made salads, or a chicken curry, usually accompanied by spicy vegetarian dishes.

We separated when my son was nine years old and I began to reintroduce meat dishes to my repertoire. In that French cookbook, I found a recipe for Coq au vin, a dish my mother had made from time to time. I was happy enough with the result, even more so when I developed the habit of cooking it at least a day in advance and removing the solid layer of fats from the surface of the jellied juices.

Over the next few years, I continued to adapt the recipe to suit my palate and cooking style, to the point where I chose it as the centrepiece of a meal I cooked to celebrate my 50th birthday.

Then I returned to Melbourne after 30 years in Western Australia and, within a few months, Maggie and I had established a home together. Coq au vin was one of the first dishes we cooked together, remained a favourite and continued to evolve.

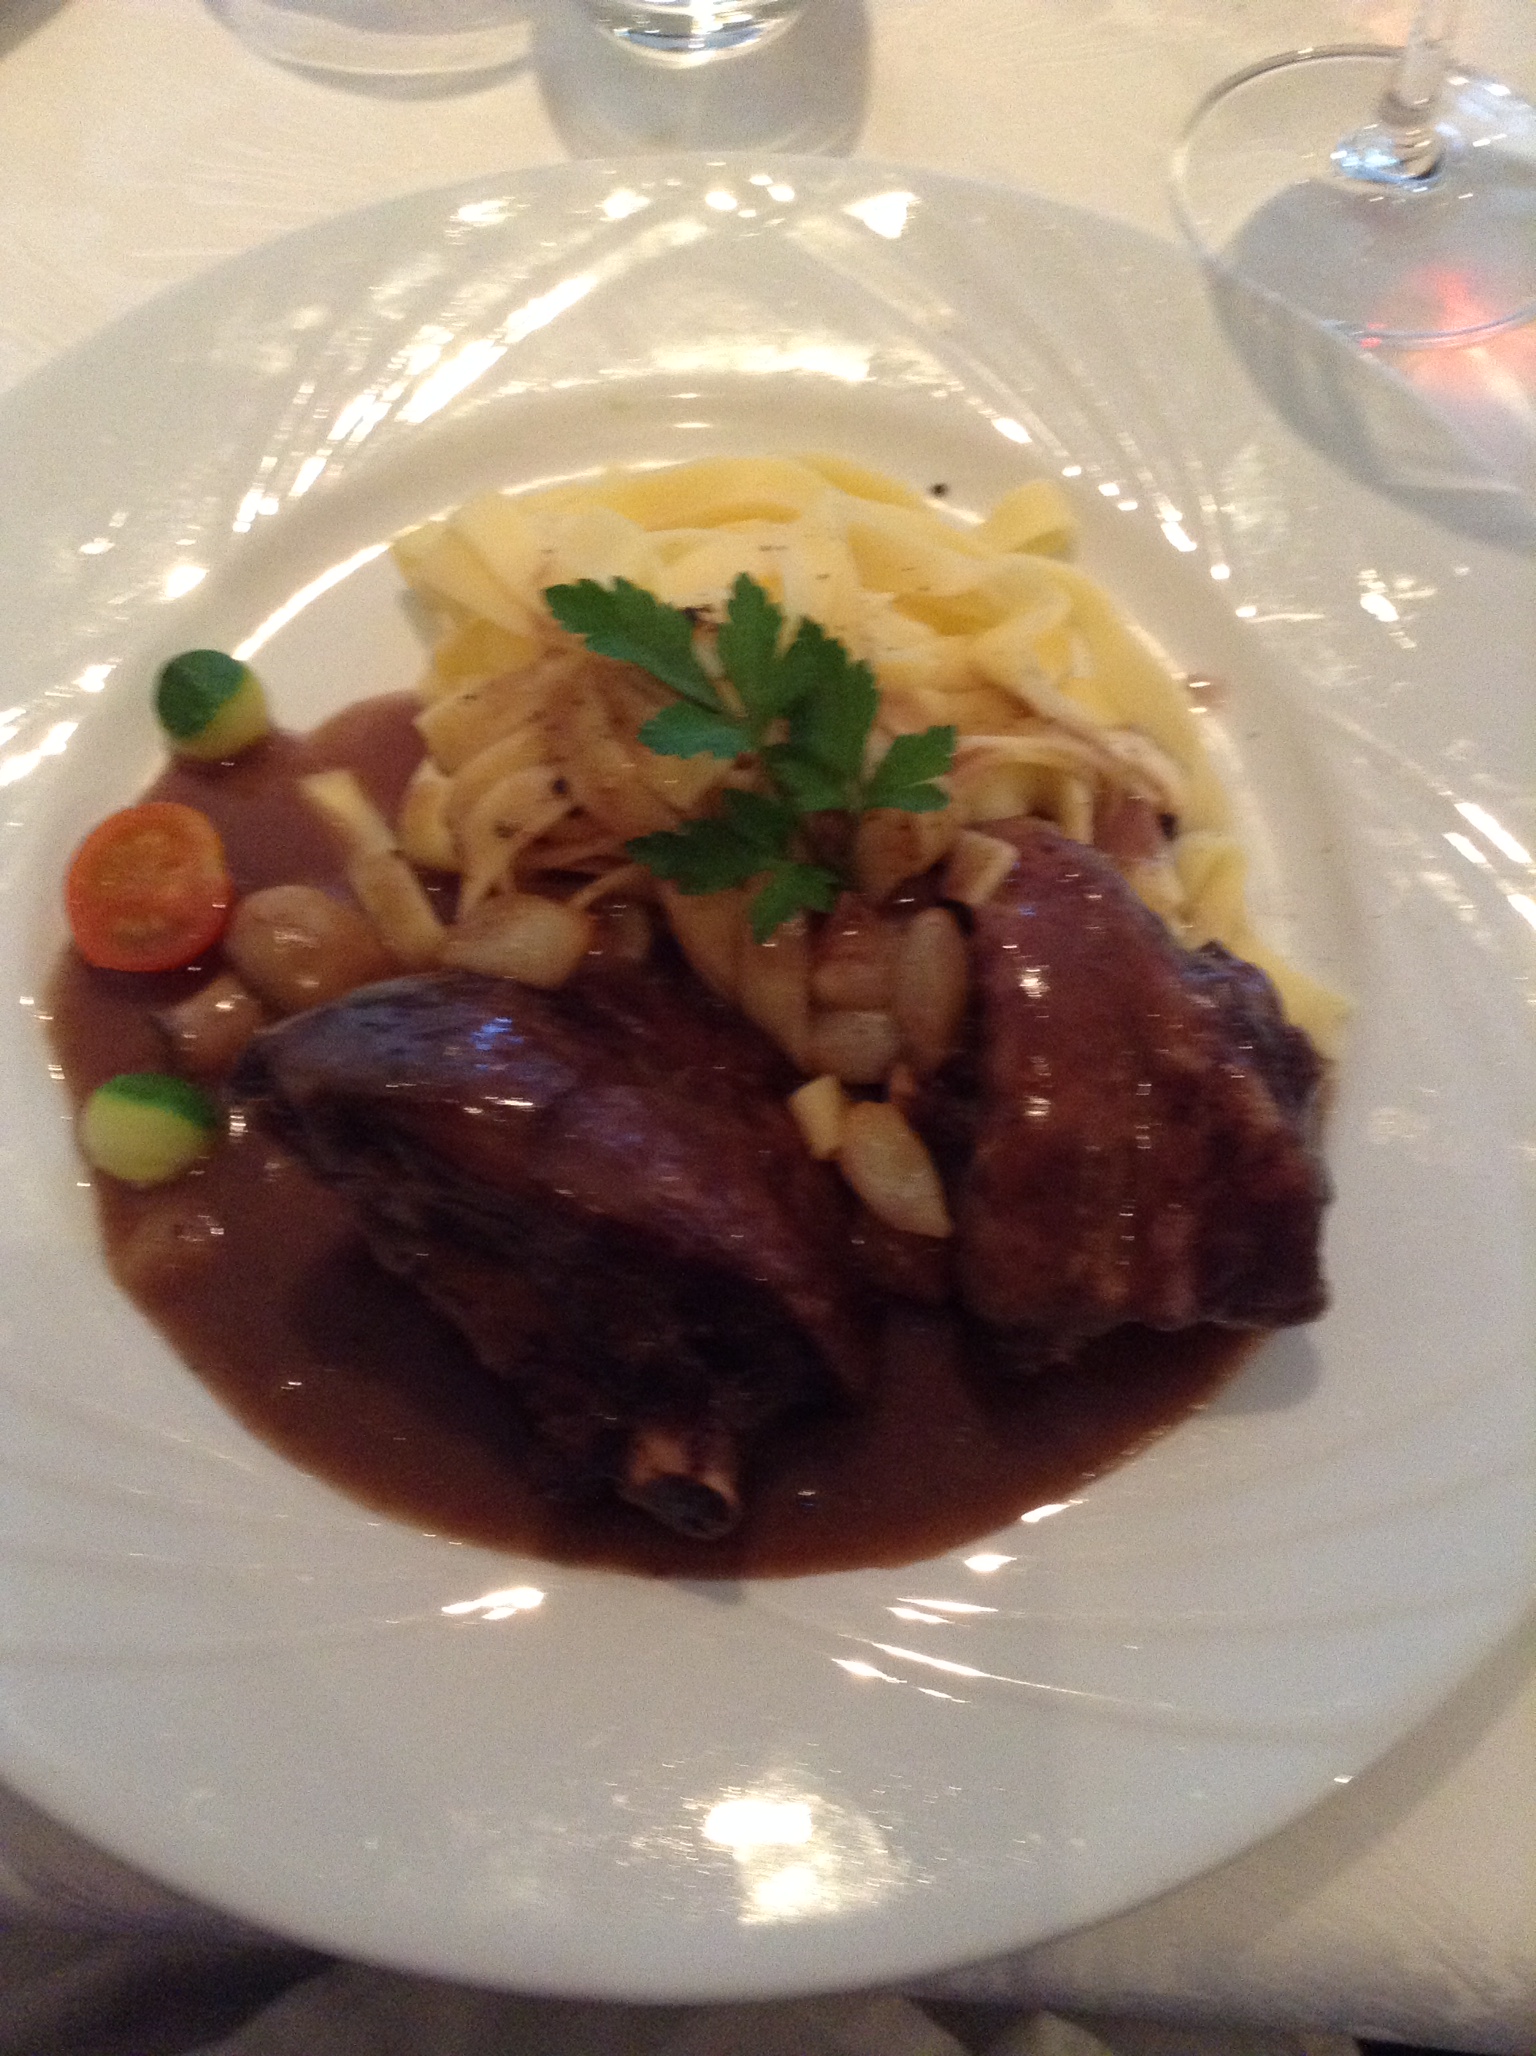
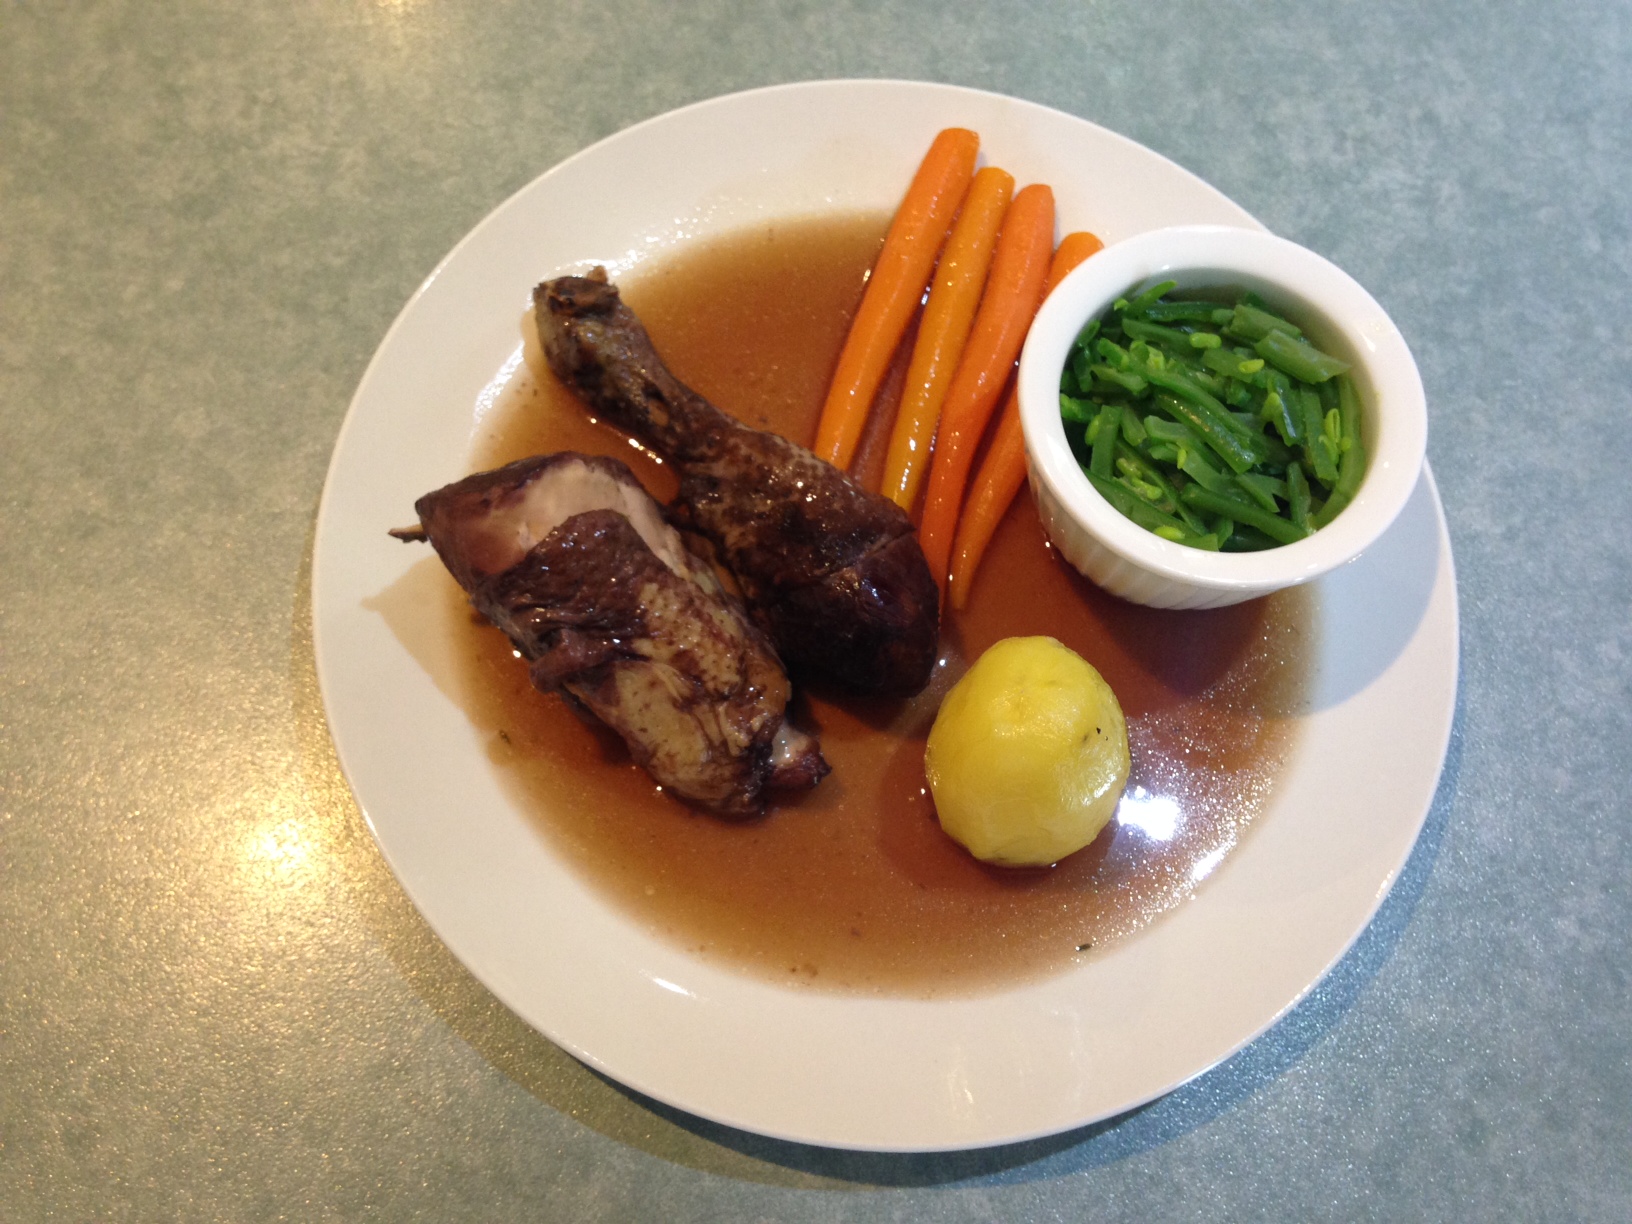
Jump to May 2014 and the city of Beaune, the heart of the fabled Cote d’Or in Burgundy, where I had an amazing plate of Coq au vin (as described in my first post about La Grilladine restaurant). Rather than falling of the bone, as often happens when I make a chicken casserole, the meat was firm, yet not chewy.  Secondly, the jus had all the familiar flavours but it was clear and devoid of vegetables, etc. I was intrigued and I resolved to try to produce something similar after we returned to Melbourne.

By chance the next day, I found a postcard that featured a Coq au vin recipe. It was written in French but my travel-eat-and-drink French was up to the task; not that it was difficult to recognise that the main ingredient was not a chicken but a rooster, ie un coq! (The afore-mentioned French cookbook had chicken as the poultry but that might have been to make it palatable to English-speaking home cooks.)

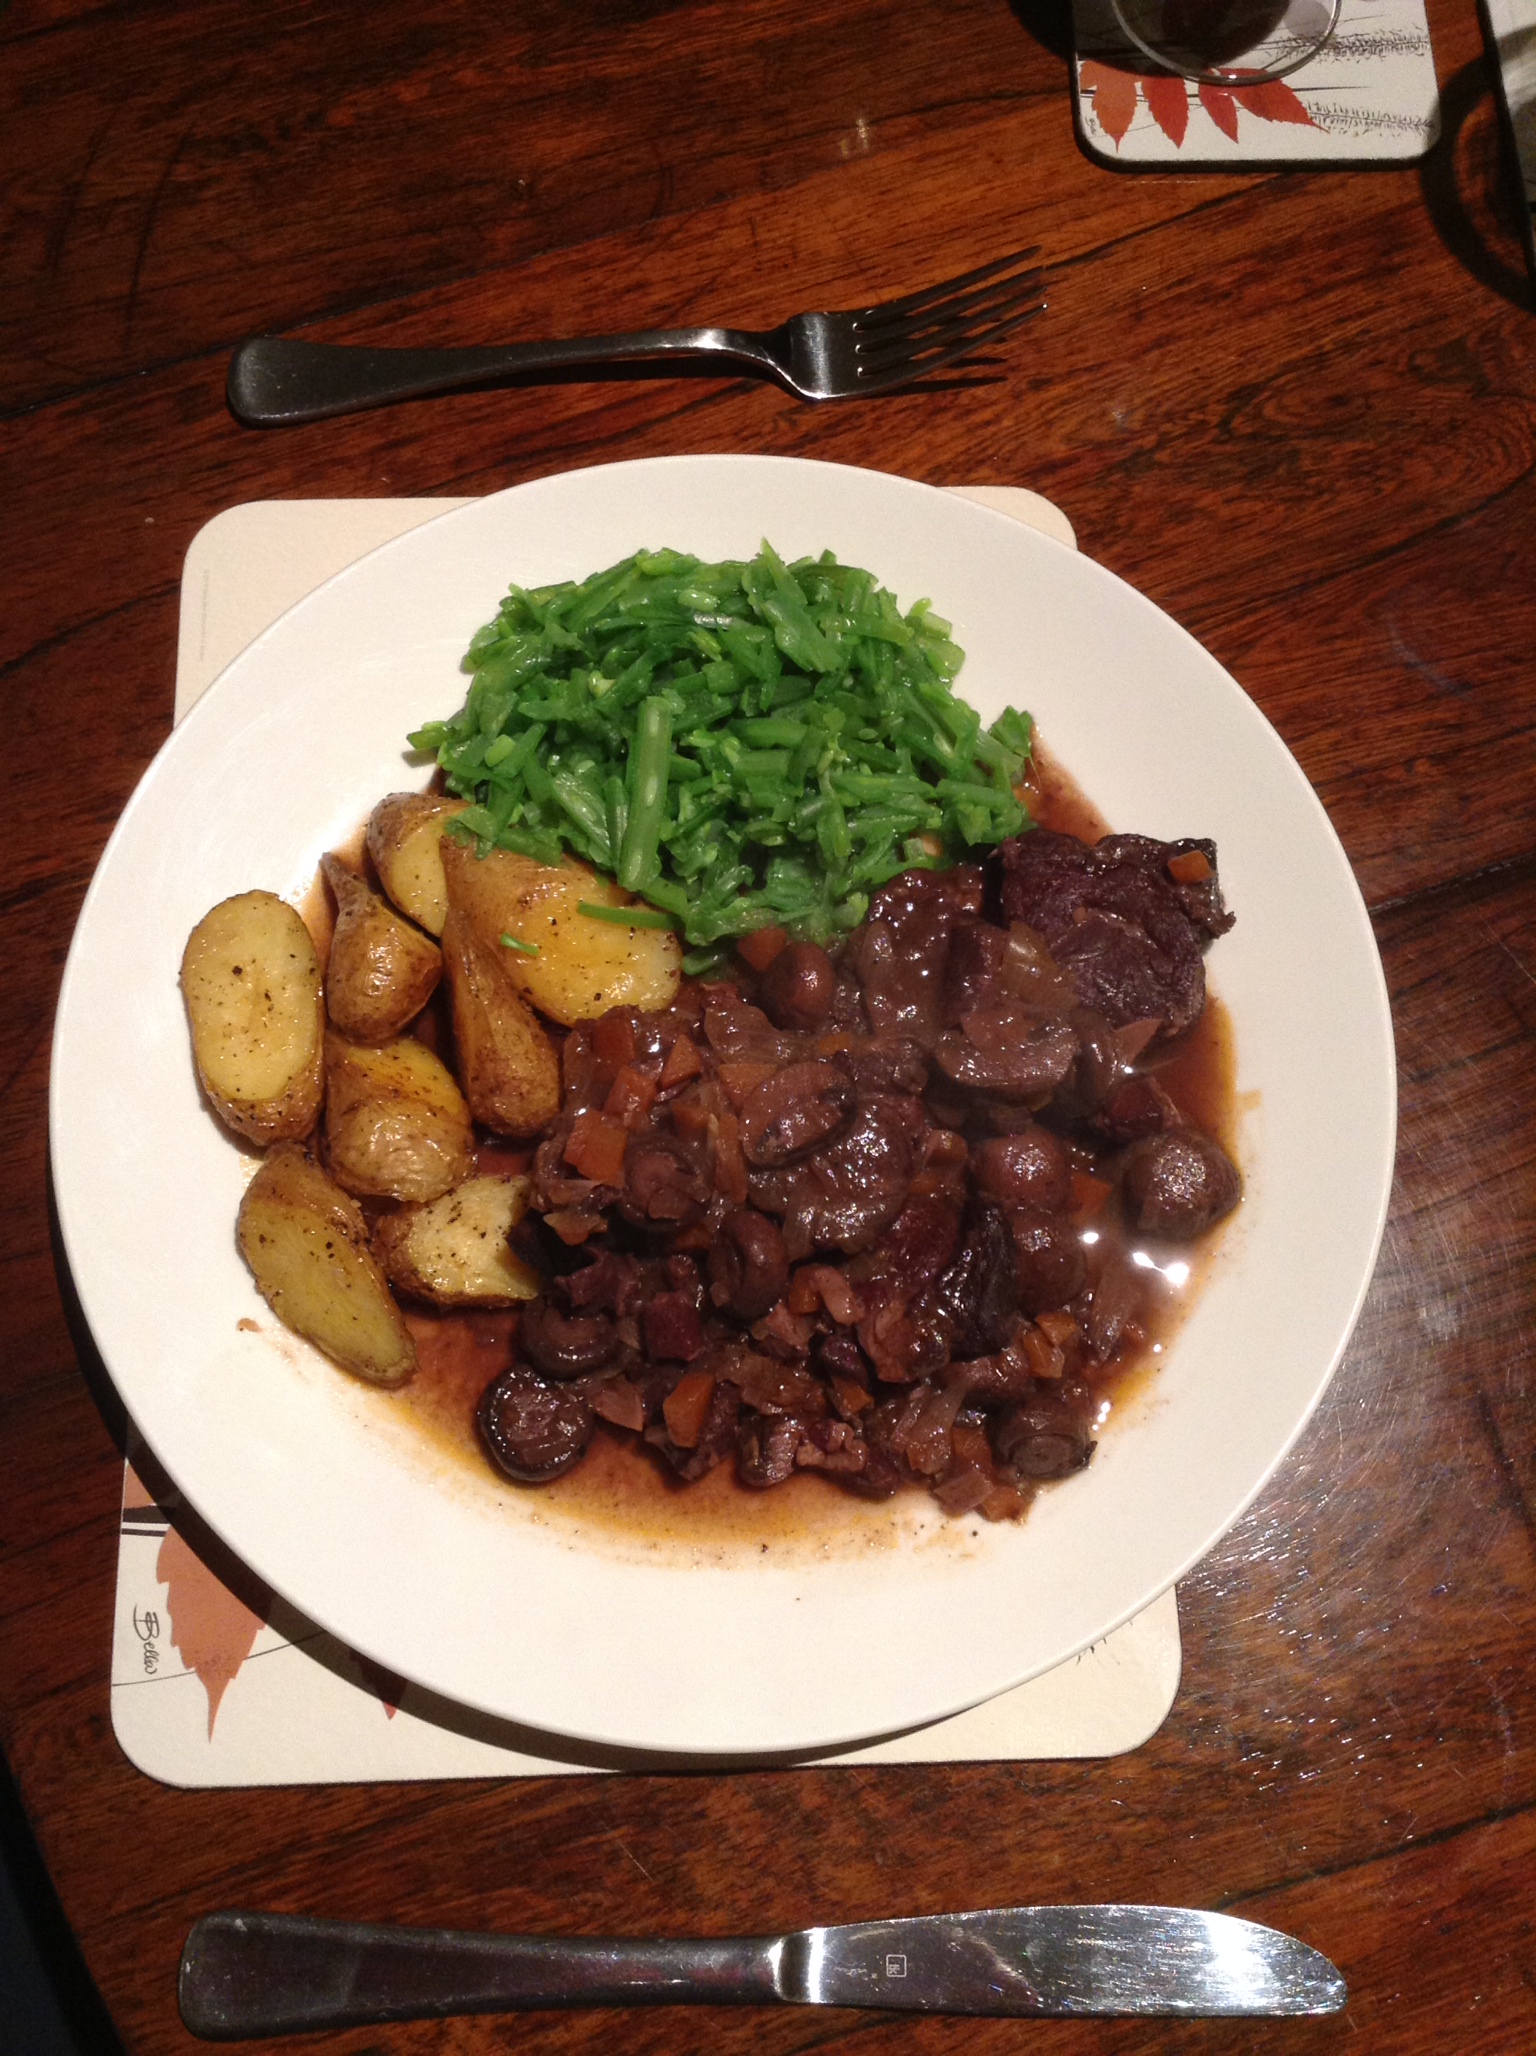
Last Sunday we served that promised dish of Coq au vin to ourselves and our favourite neighbours. We were pretty proud of the result, as shown in the second photo. Now for the story of how we made it.

La Grilladine's Coq au vin

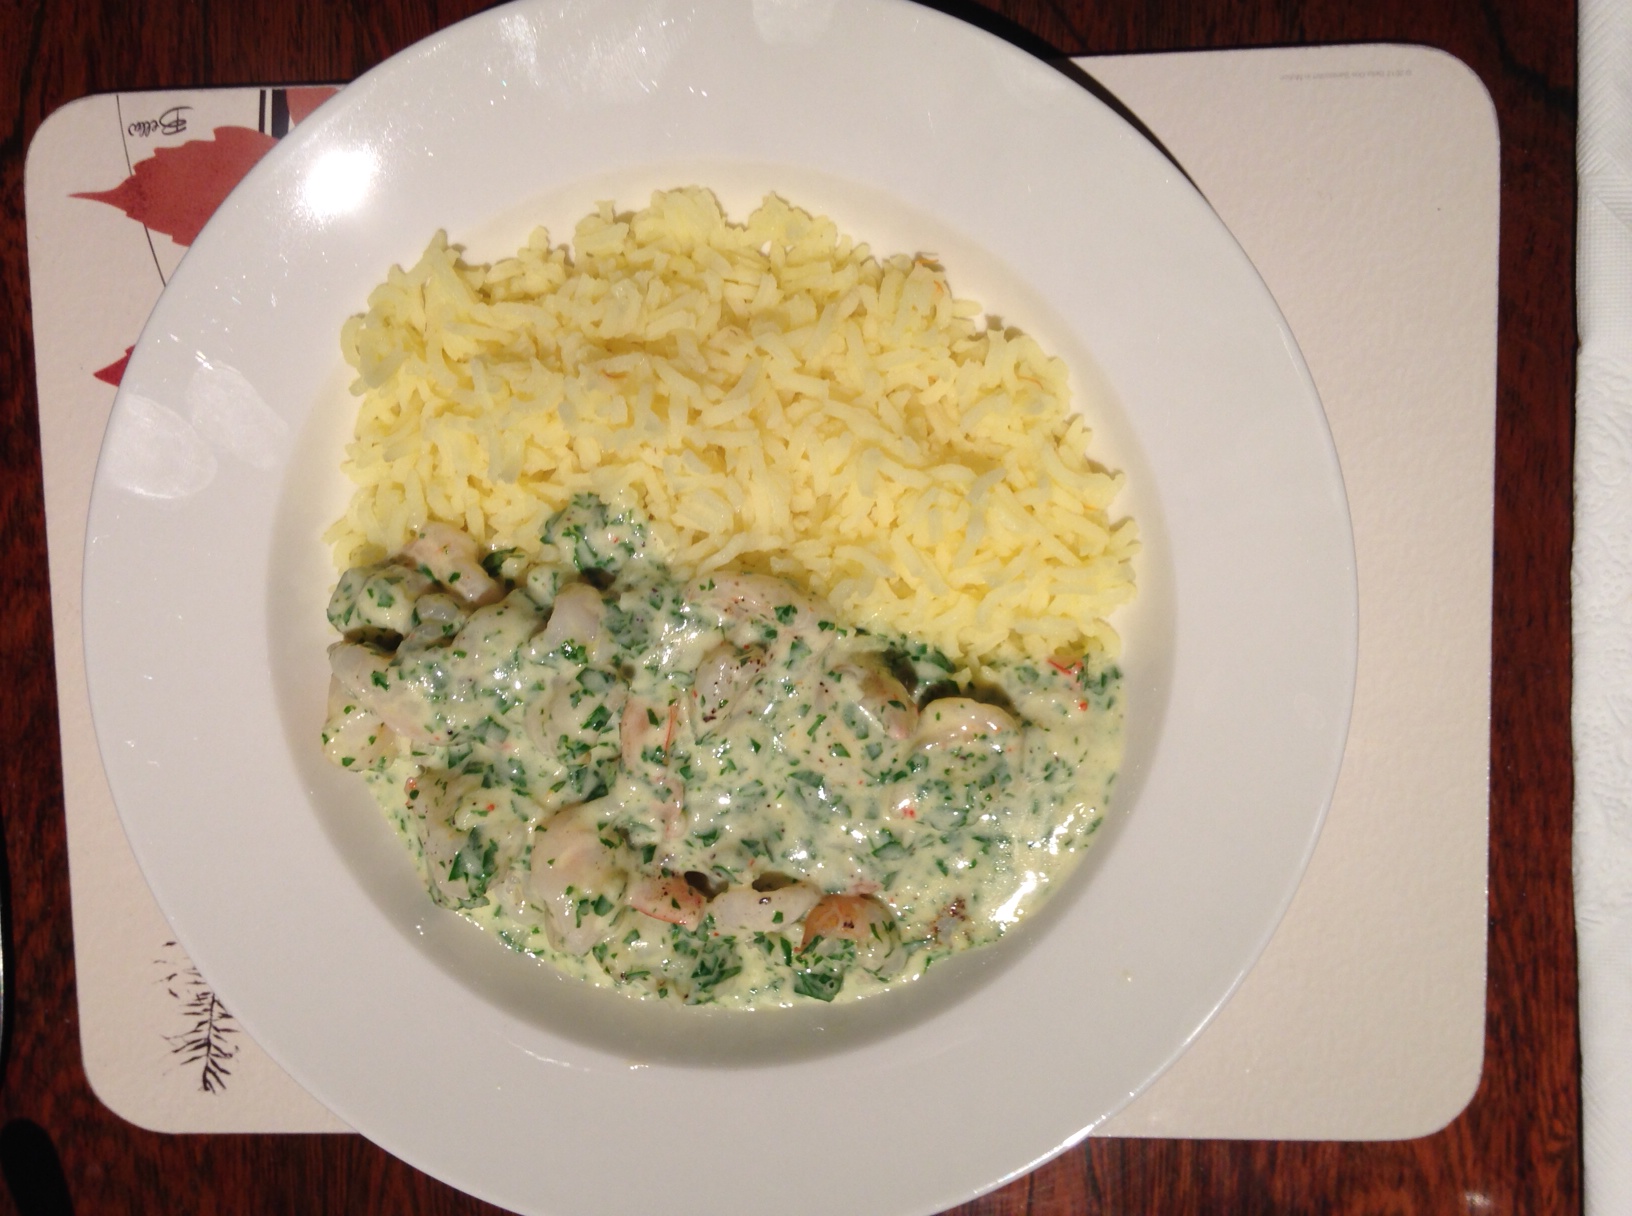
La Grilladine’s Coq au vin

Coq au vin chez nous

Coq au vin chez nous

Here is the list of ingredients, starting with the rooster we sourced from John Cester’s at Prahran Market:

1 young rooster, about 2kg, cut into 10 pieces (each breast cut into two pieces)
3 cups (750ml bottle) medium-to-full-bodied red wine (shiraz, a shiraz blend or, if you have the euros, a good red Burgundy, remembering that you should only cook with a wine you are happy to drink)
2½ cups chicken stock
30ml olive oil
60ml brandy
20g unsalted butter
100g kaiserfleisch, coarsely chopped
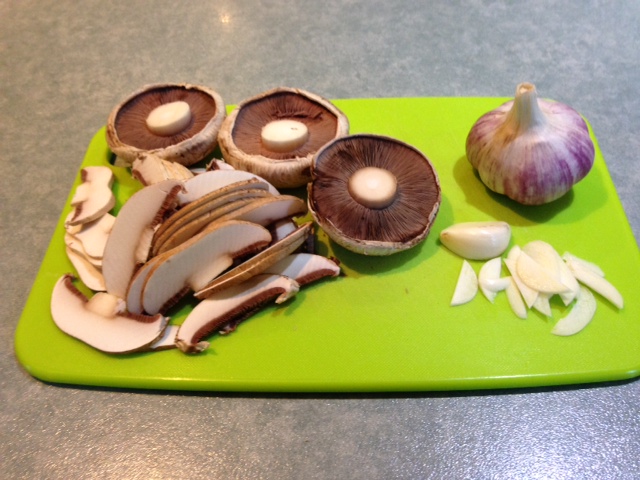
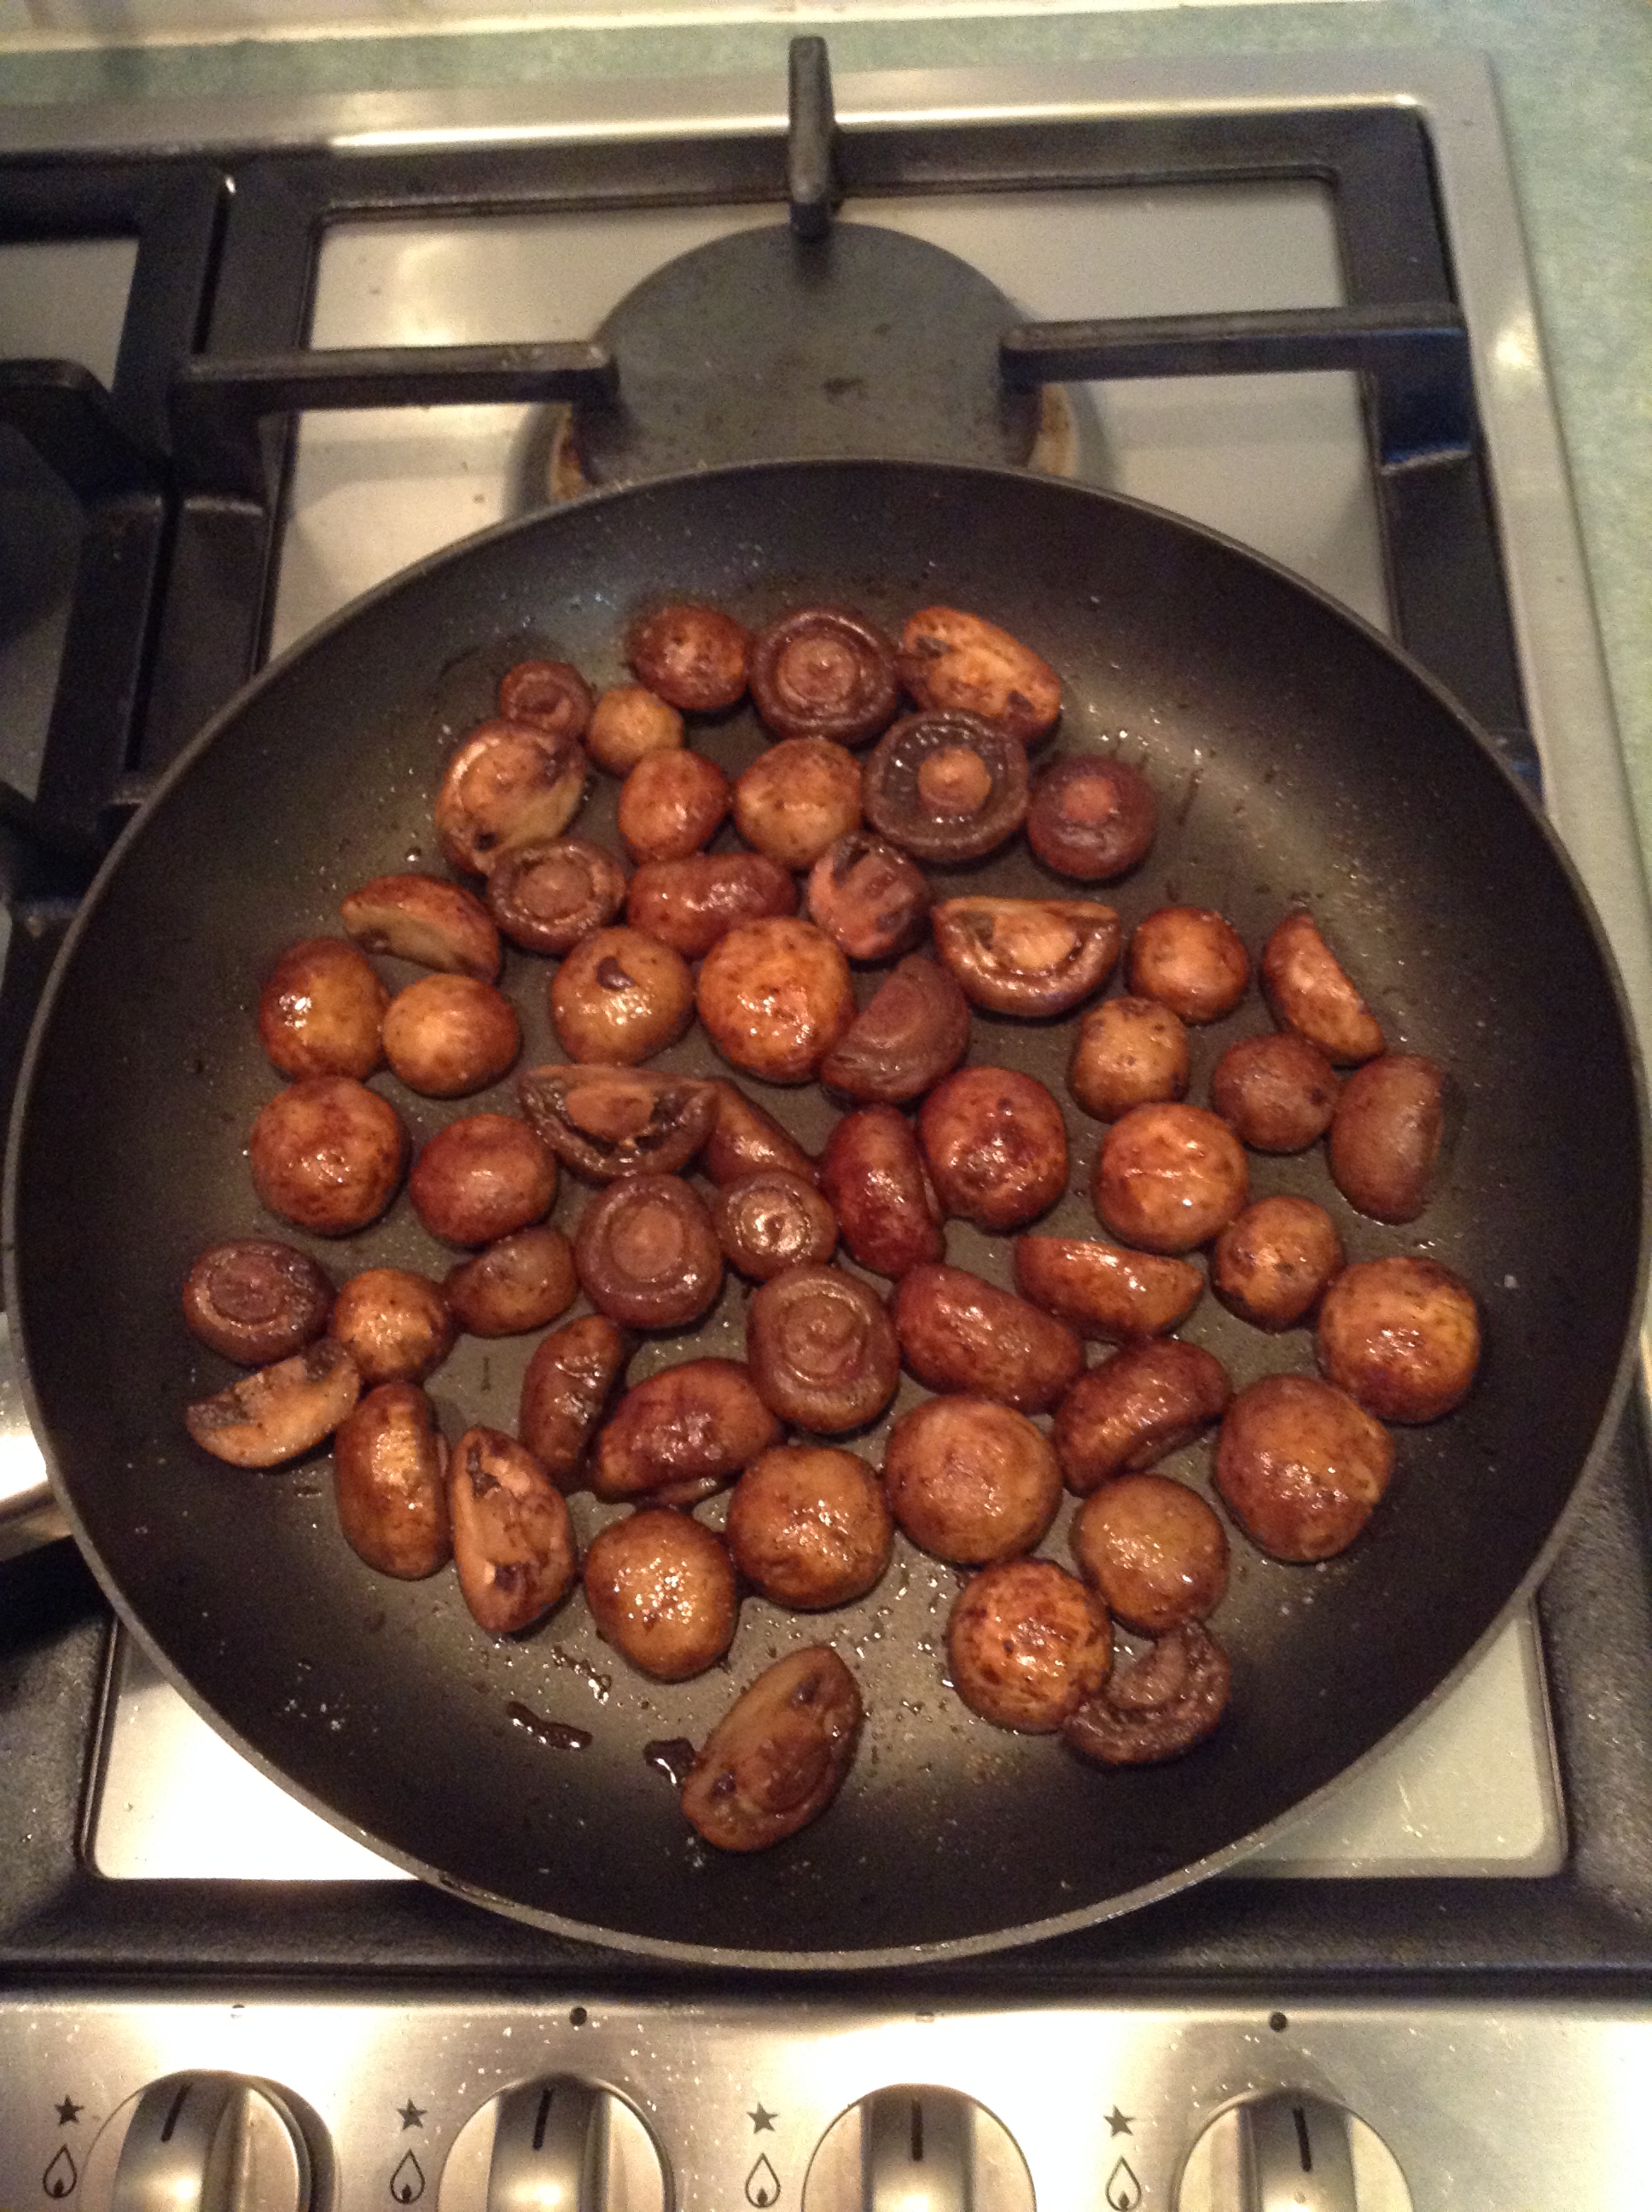
150g button Swiss Brown mushrooms, each cut into two or three pieces
12 French (brown) shallots, peeled
2 cloves garlic, peeled and finely sliced
1 large sprig thyme
1 bay leaf
1 large sprig of parsley
salt, pepper, to taste

And here is the method.

First day

  1. Remove the last two sections of each wing and set aside. Trim all the other pieces of rooster of any obvious fat and place them in one layer in a large, flat-bottomed glass or ceramic dish. Pour over enough of the wine to cover the pieces, cover with cling film and refrigerate overnight. (Any leftover wine will be used on the second day, so don’t drink it!)
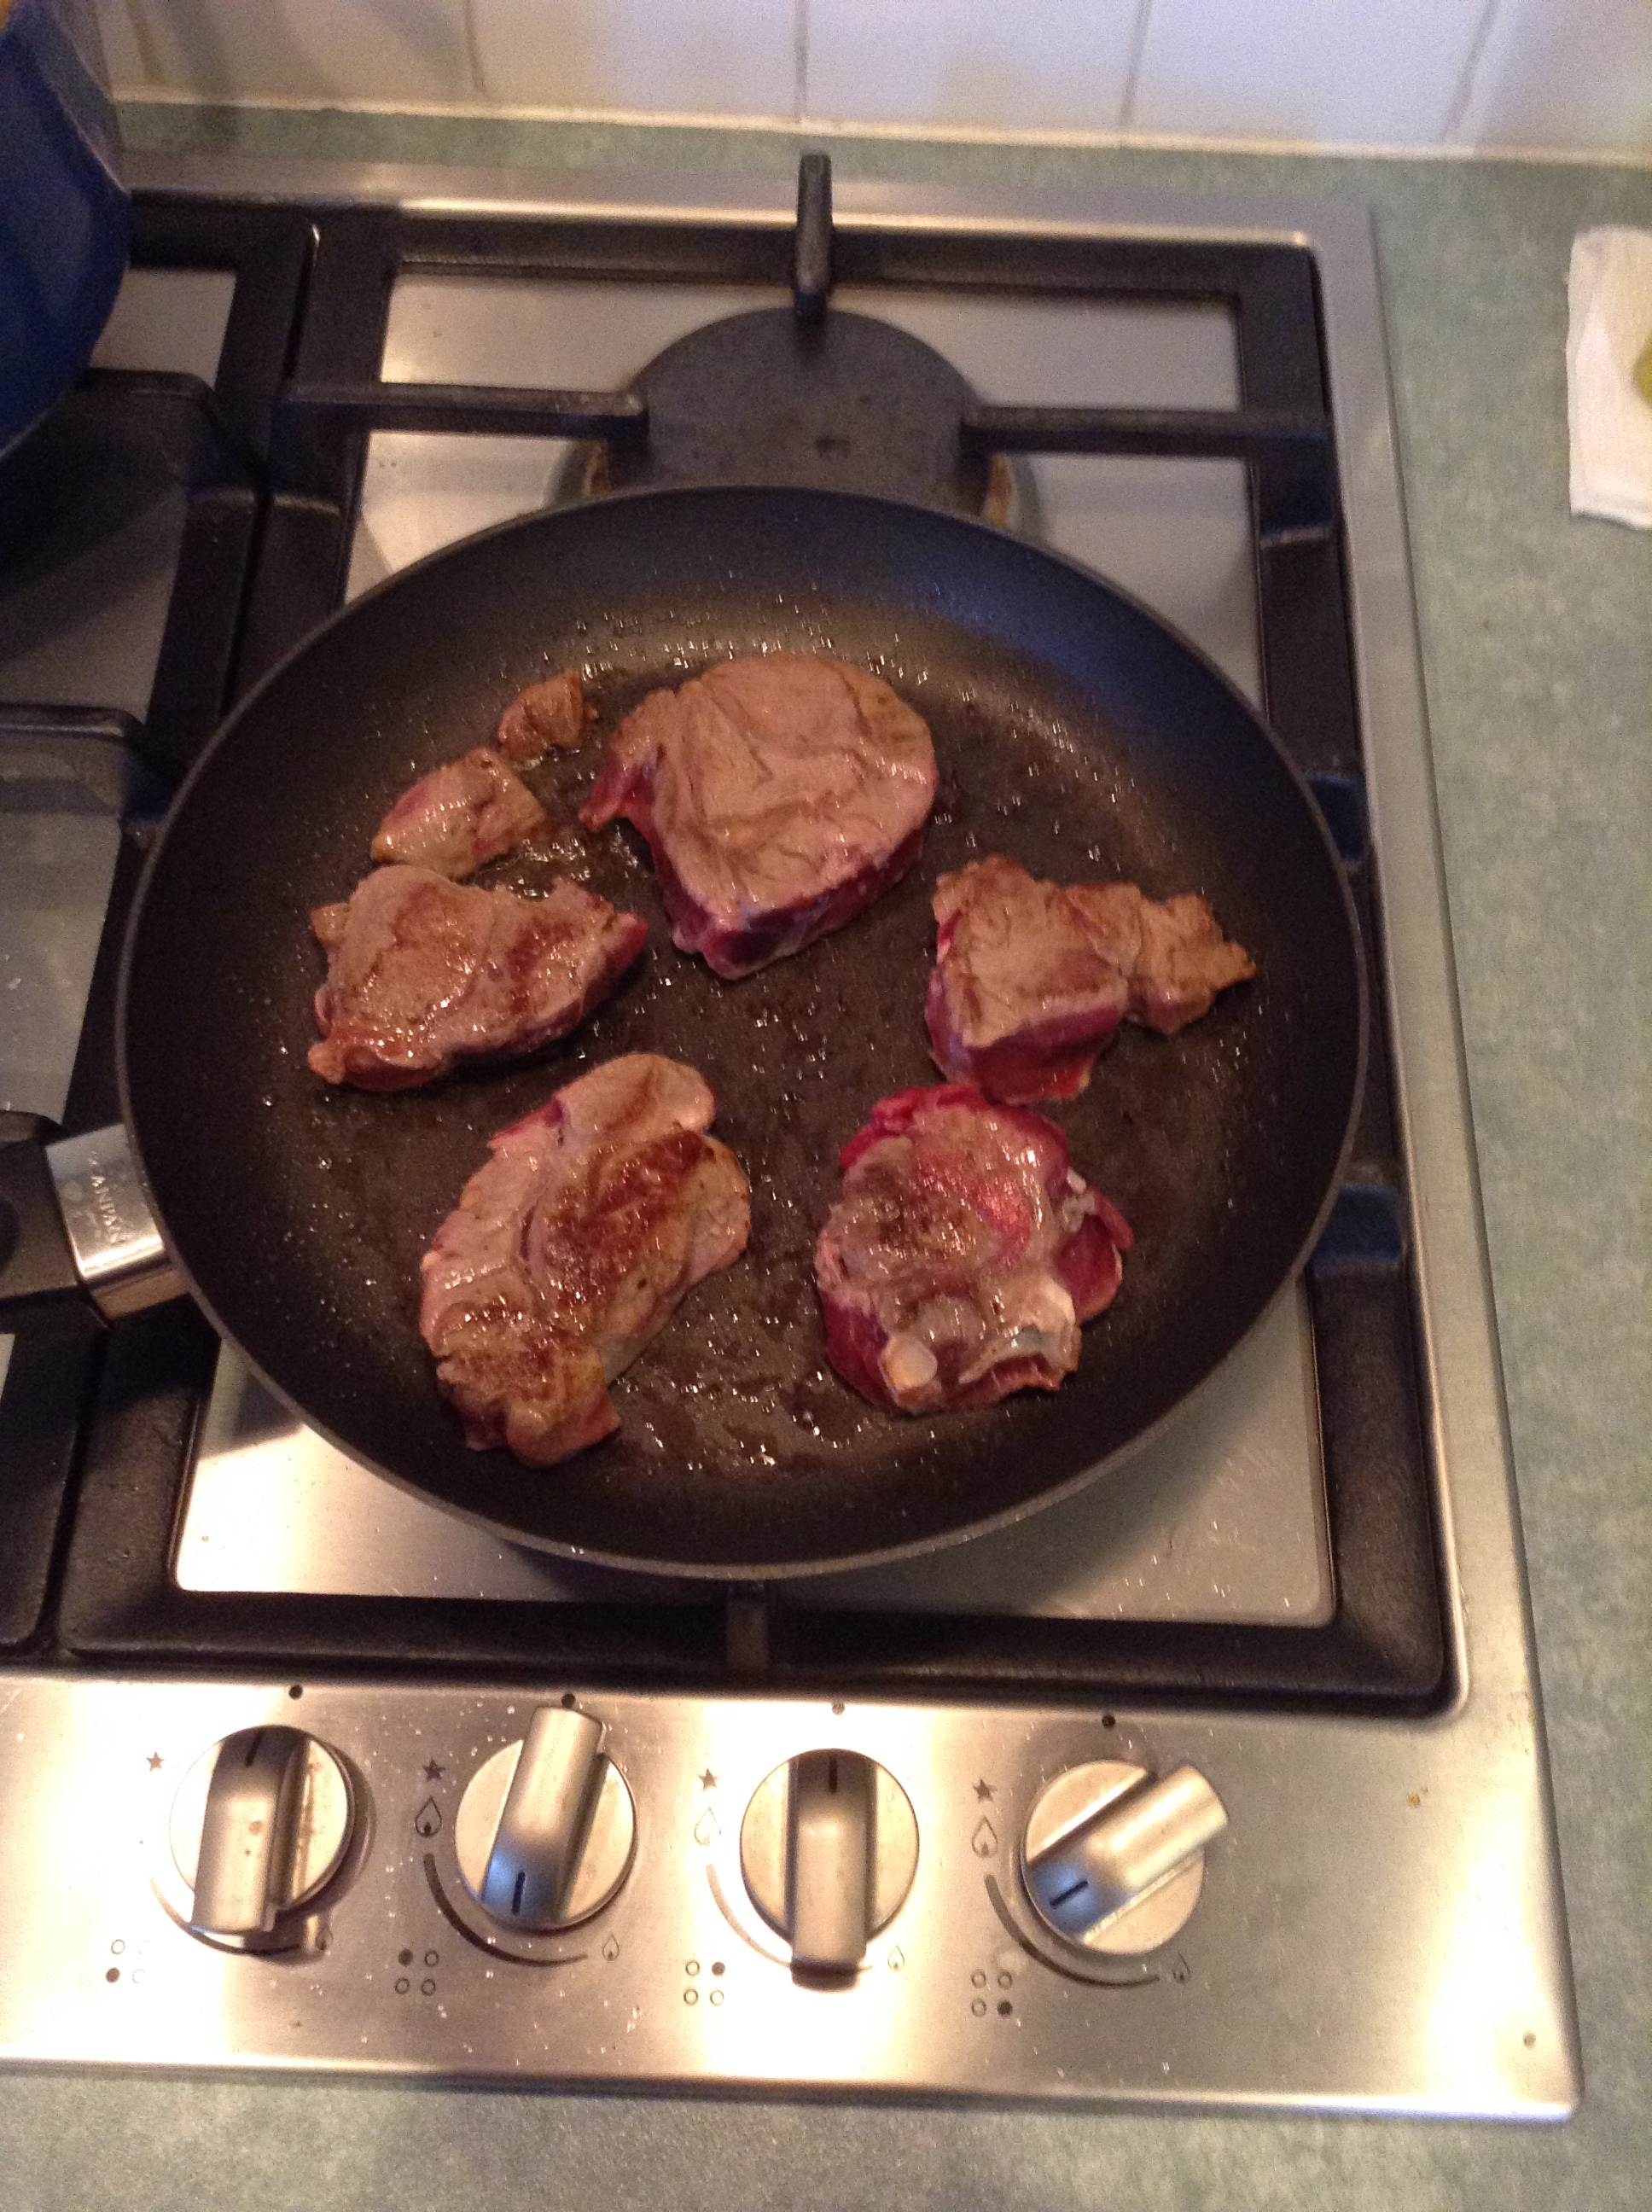
  2. Heat 10ml olive oil in a non-stick pan and gently brown the reserved wing sections. Remove from the pan, season and place them in a saucepan. Add the chicken stock to the pan, bring to the boil and simmer for 30 minutes. Remove the pieces of wing and, when the stock has cooled, refrigerate it overnight in a covered bowl.

Second day

  1. Remove the pieces of rooster from the wine and place them in a colander over a bowl. Reserve the wine, including any liquid released by the colander.
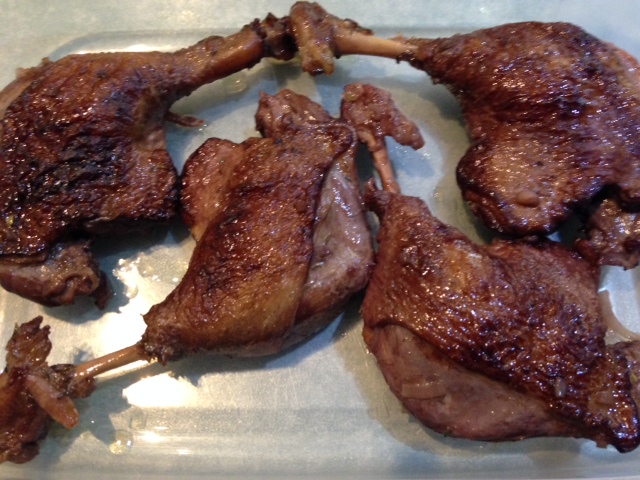
  2. Heat the oven to 170C (fan-forced). Divide the pieces into two batches – breasts and thighs, drumsticks and wing sections. Add 20ml olive oil to a roasting pan, add the six large pieces and roast them for 35 minutes, turning them once or twice. Transfer them to a large bowl and season generously. Repeat this step with the smaller pieces but only roast them for 20 minutes. (I use this procedure whenever I am browning pieces of poultry or lamb on the bone in readiness for a braise. It browns the meat and renders plenty of fat without making a dickens of a mess of your cooktop!)
  3. Drizzle the brandy over the pieces of rooster.
  4. Meanwhile, pour the marinade wine and any leftover wine into a saucepan, to which you will add the stock once you have drained it through a sieve to remove most of the fat derived from the wing sections.
  5. Bring the wine and stock mixture the boil, removed the lid and simmer the liquid for 20 minutes to concentrate the flavours.
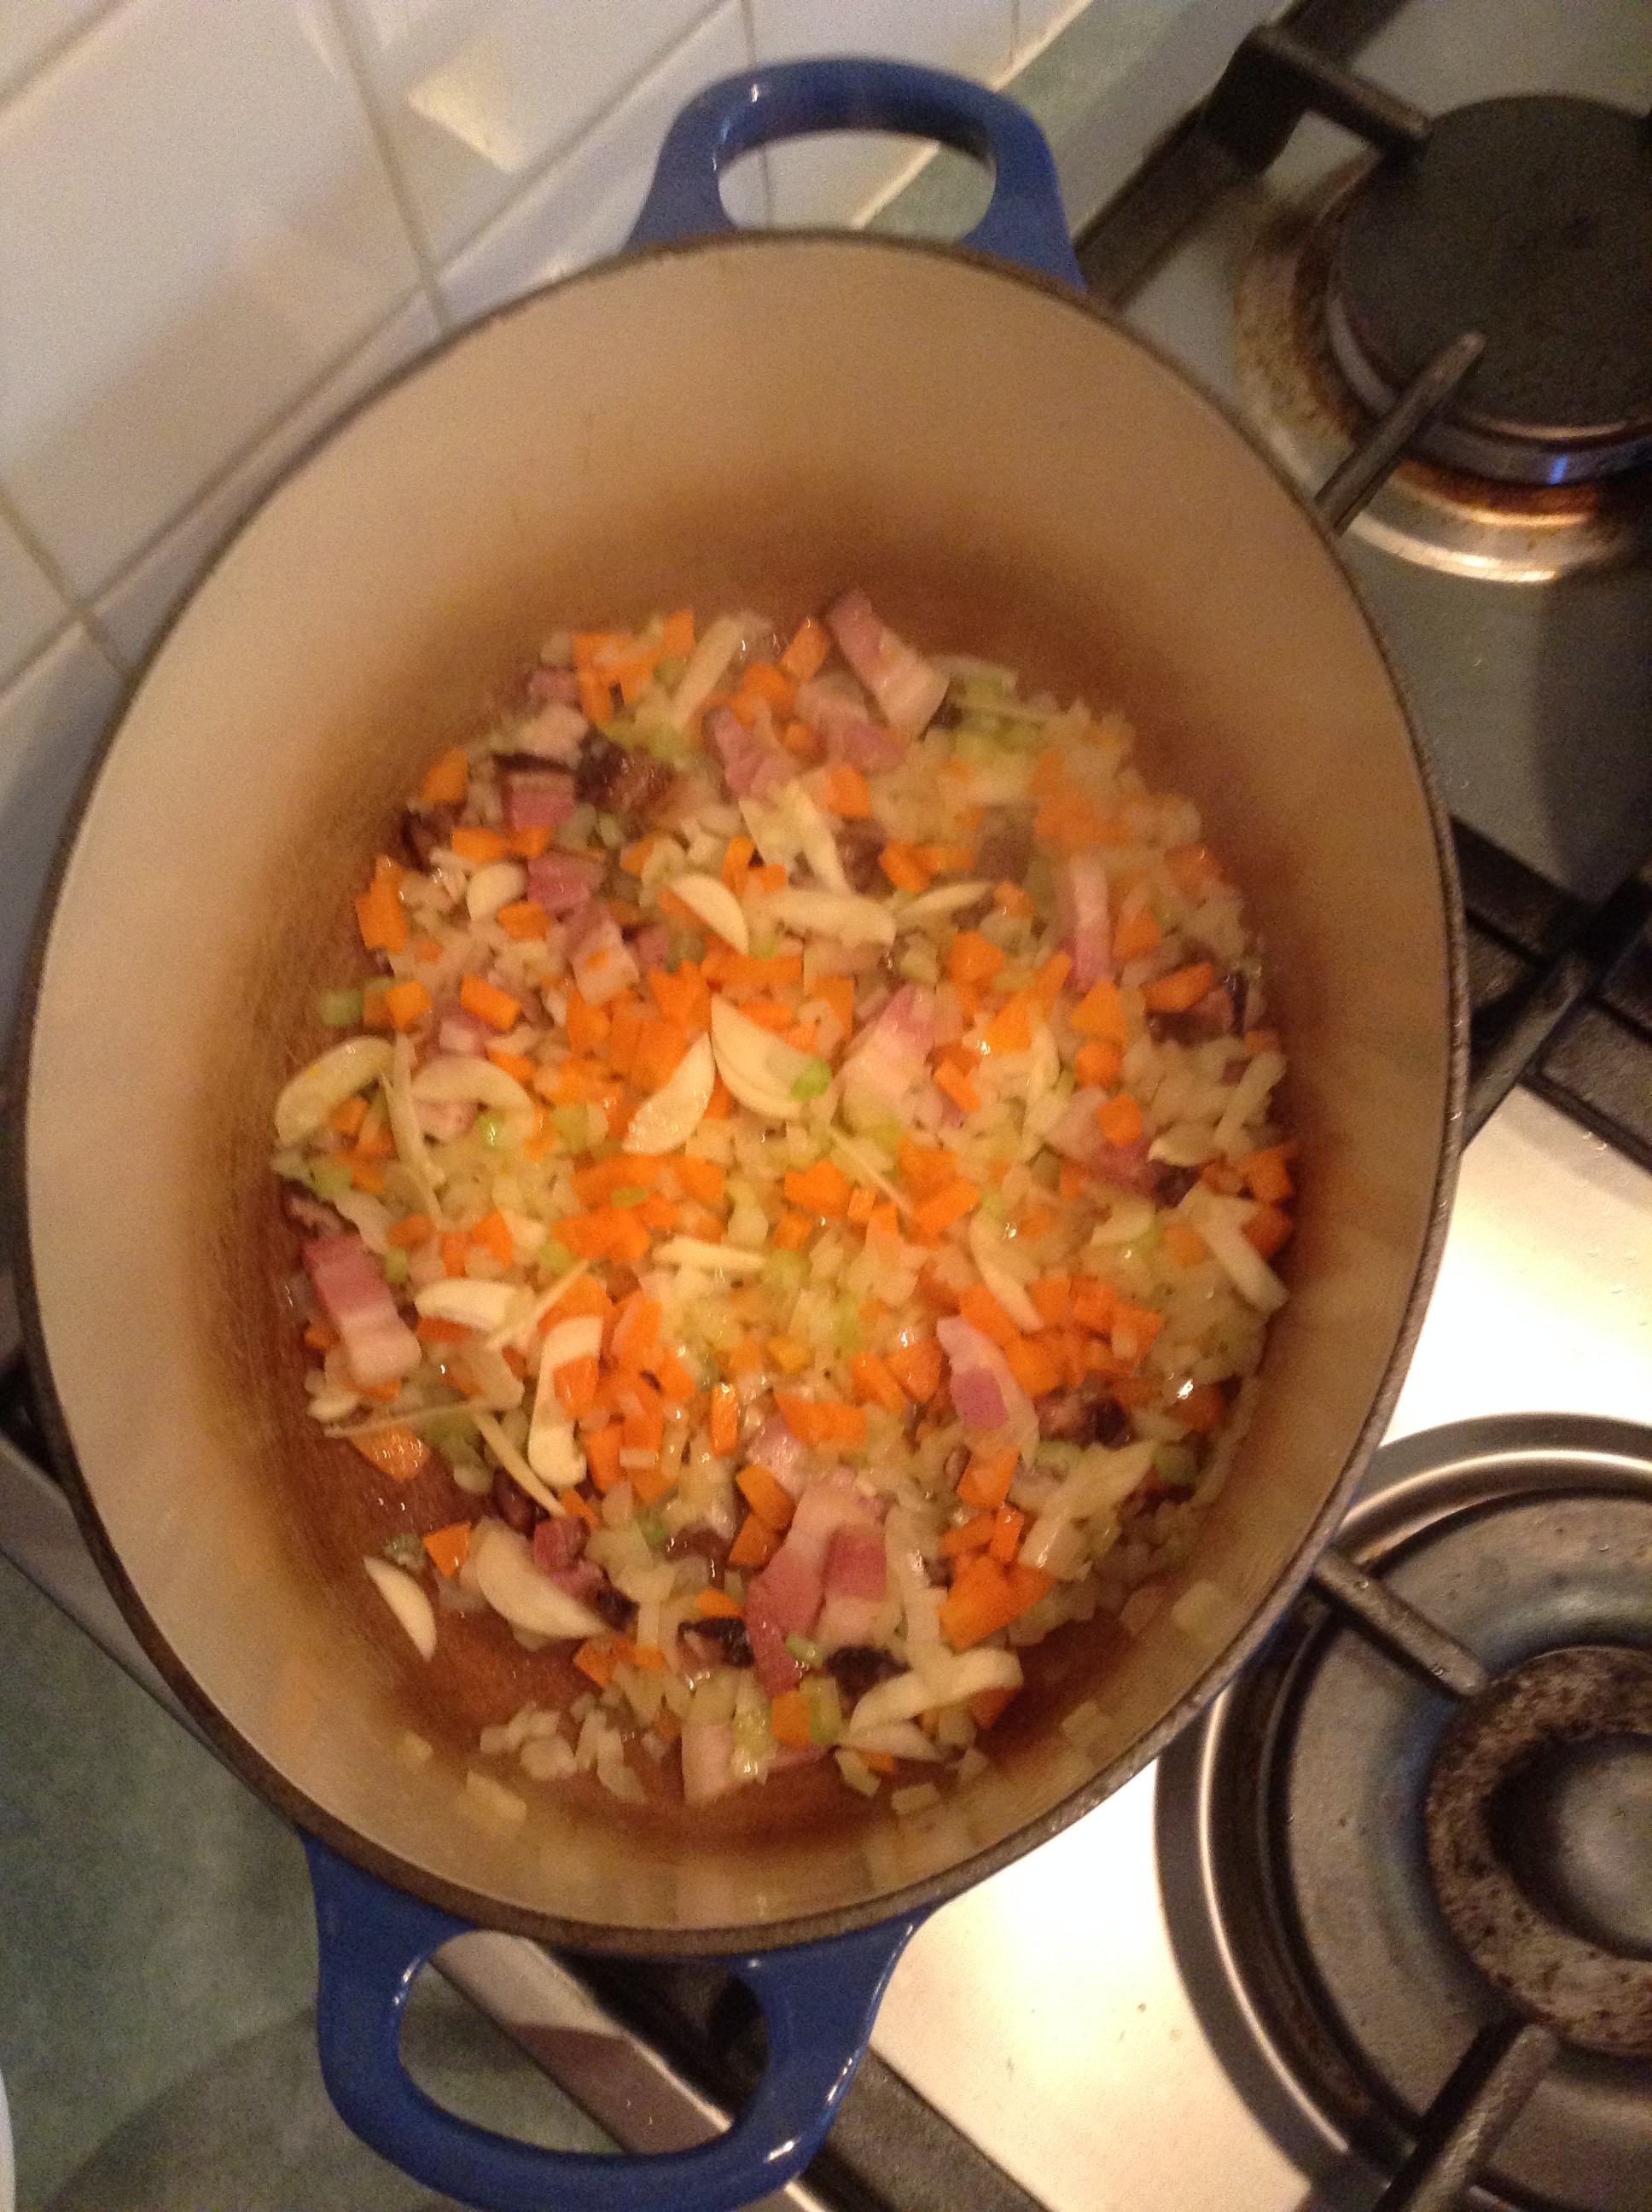
  6. Then you need to select the casserole dish in which you will cook the Coq au vin in your oven. If it is flame-proof, melt 10g butter over moderate heat, add the kaiserfleisch and mushrooms and saute for about 10 minutes. Add two ladles of the wine-stock liquid, bring to a simmer, cook, covered, over low heat for 5 minutes and repeat this step until all the liquid has been added to the pan. (This procedure gradually extracts much of the flavour from the kaiserfleisch and mushrooms.)
  7. Add all the contents of the pan to the large bowl with the pieces of rooster and brandy.
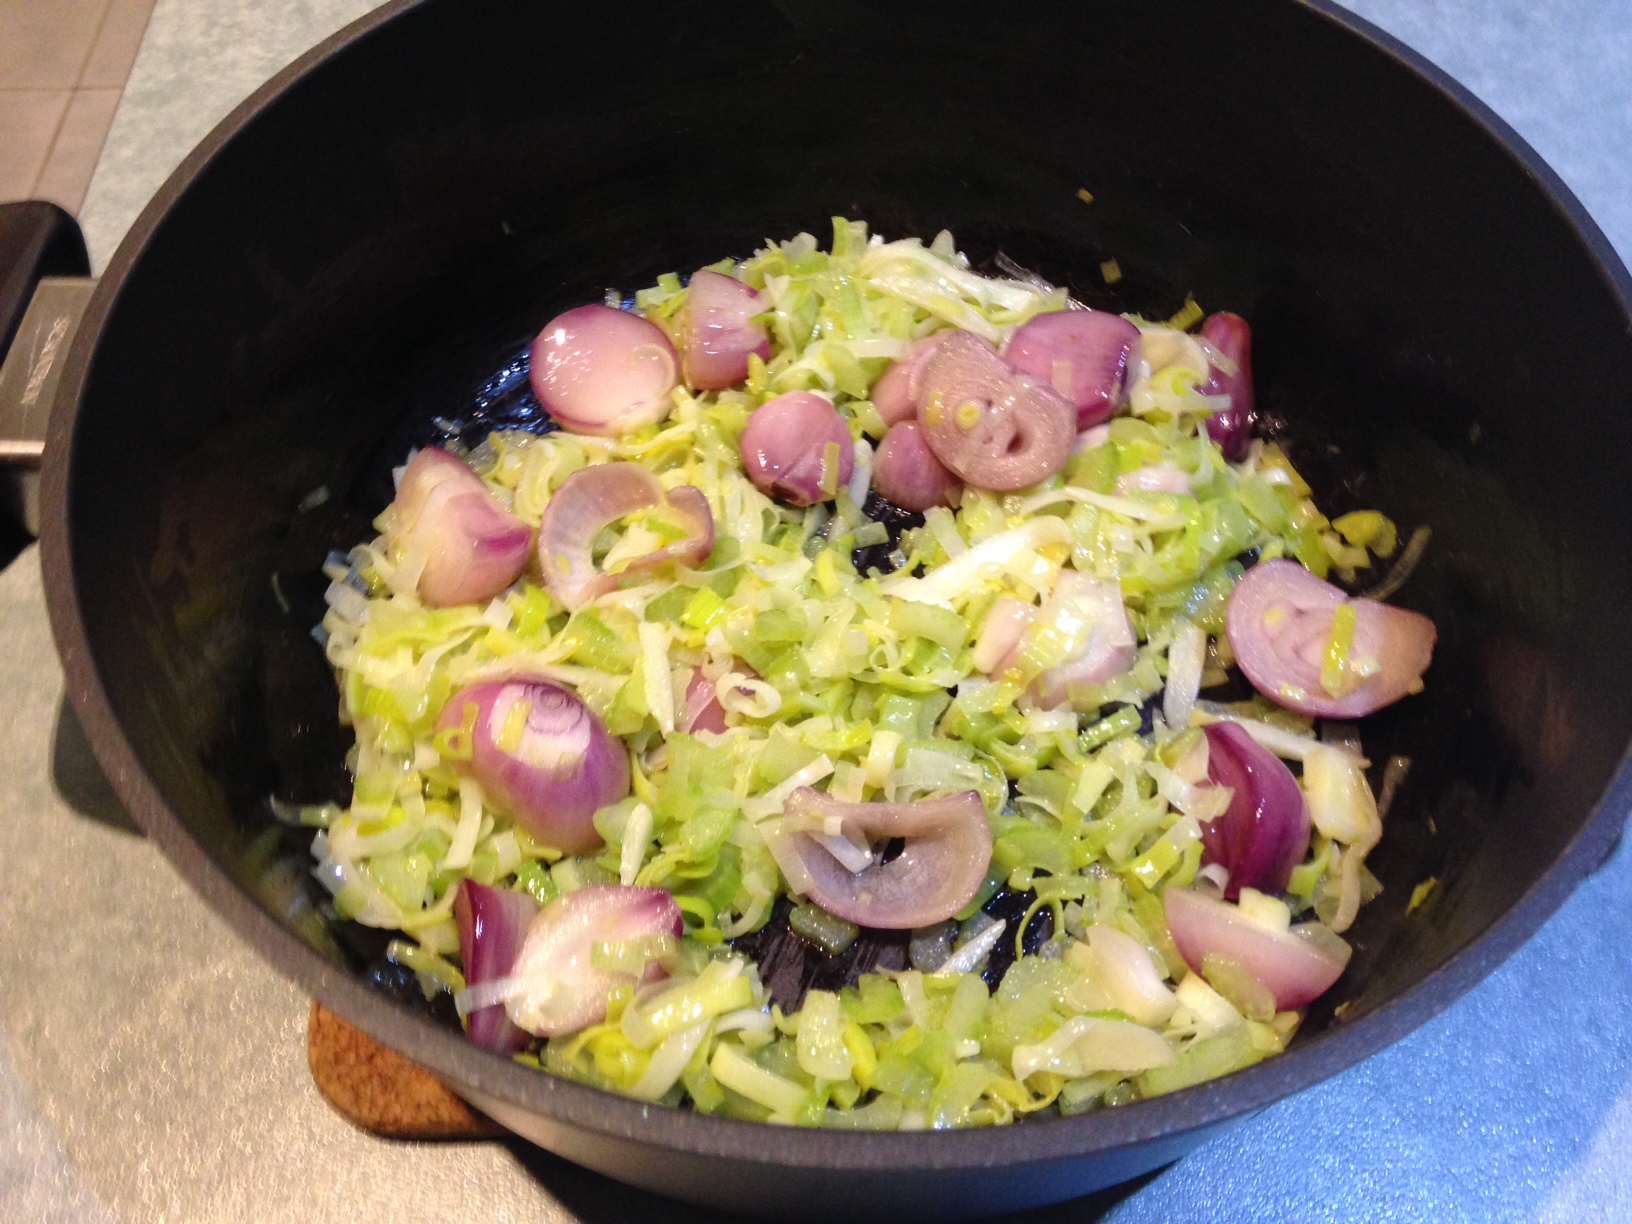
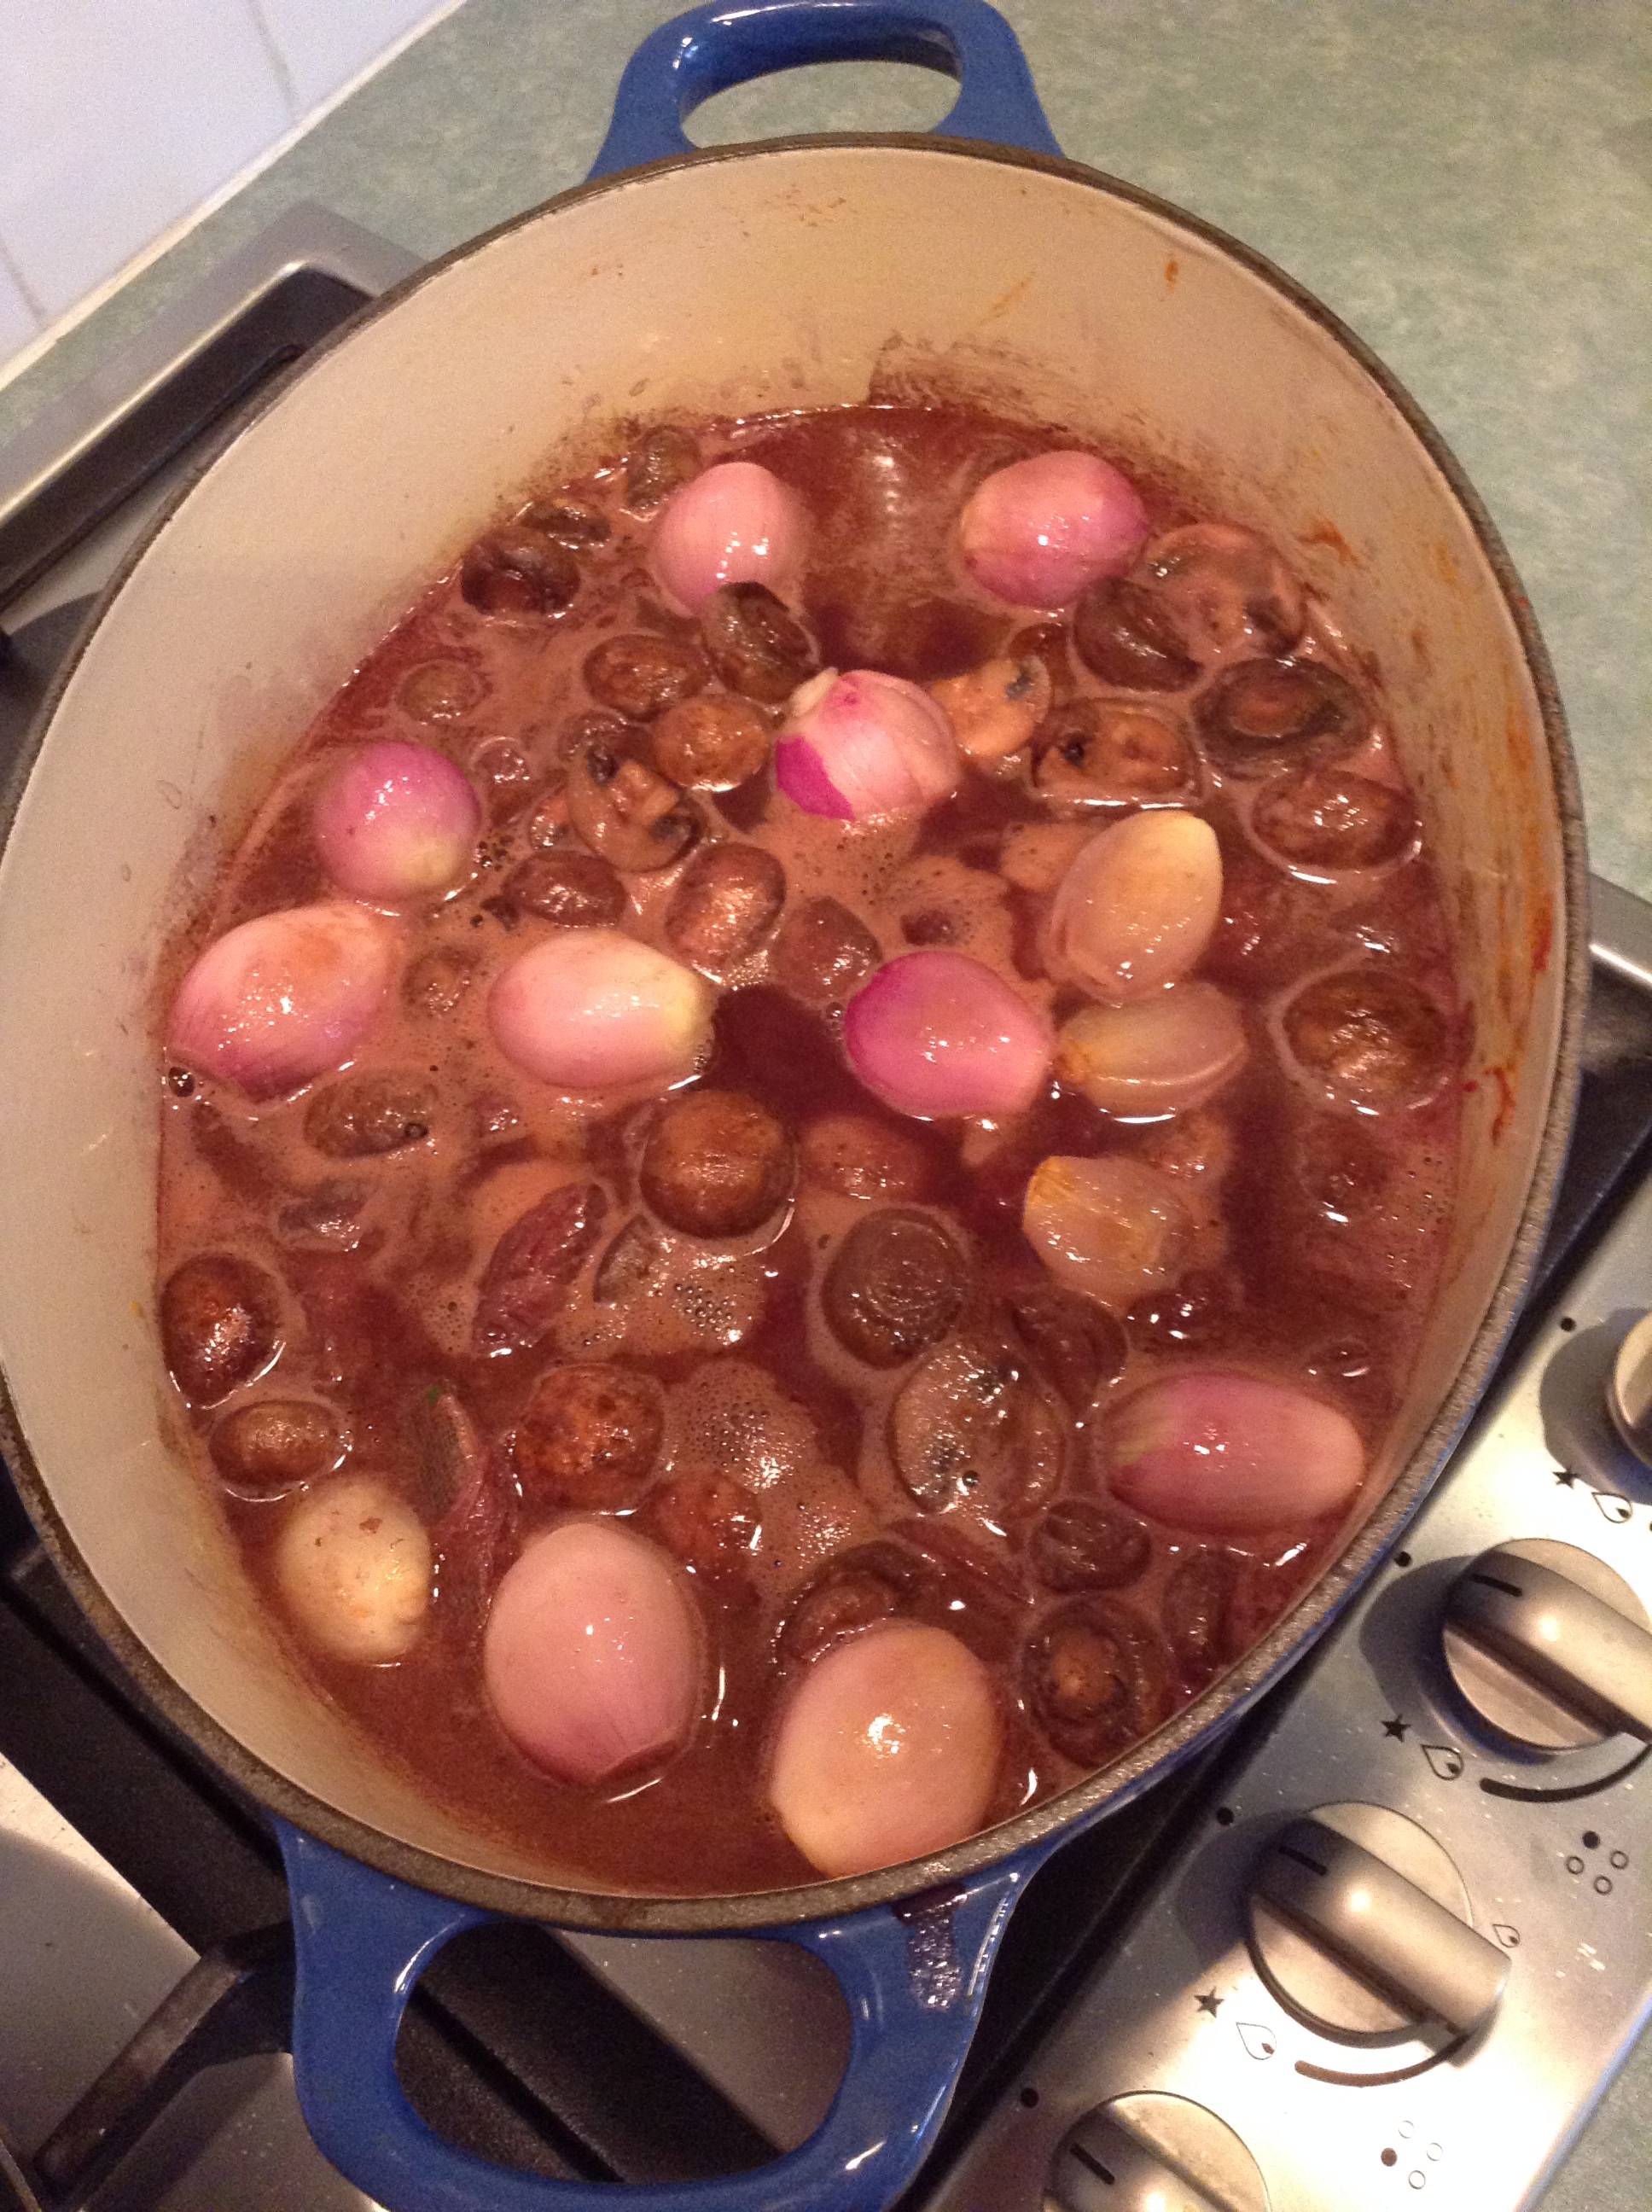
  8. Return the pan to the heat, melt the remaining butter, add the shallots and saute for 10 minutes. Add the garlic and saute for a further 5 minutes.
  9. Add the herbs and all the contents of the large bowl to the pan. Arrange the pieces of rooster evenly, cover and bring to the boil.
  10. Transfer to oven preheated to 150C and cook for 1½ hours (reduce temperature if the liquid is bubbling too briskly). Adjust seasoning after 30 minutes and again after 60 minutes. Remove from the oven and leave uncovered to reduce the temperature.
  11. Cover again and refrigerate overnight

Third day

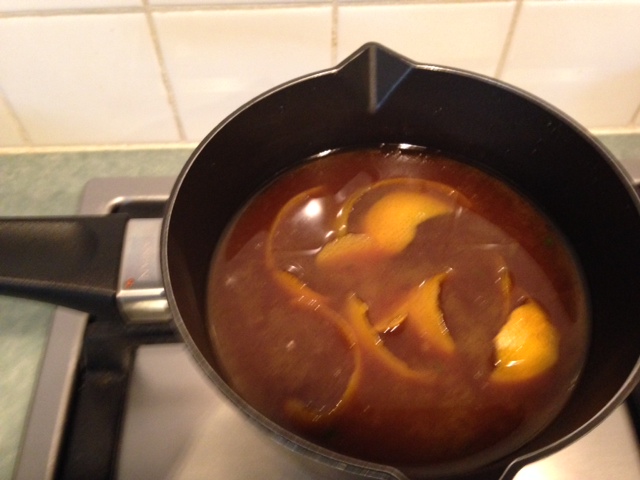
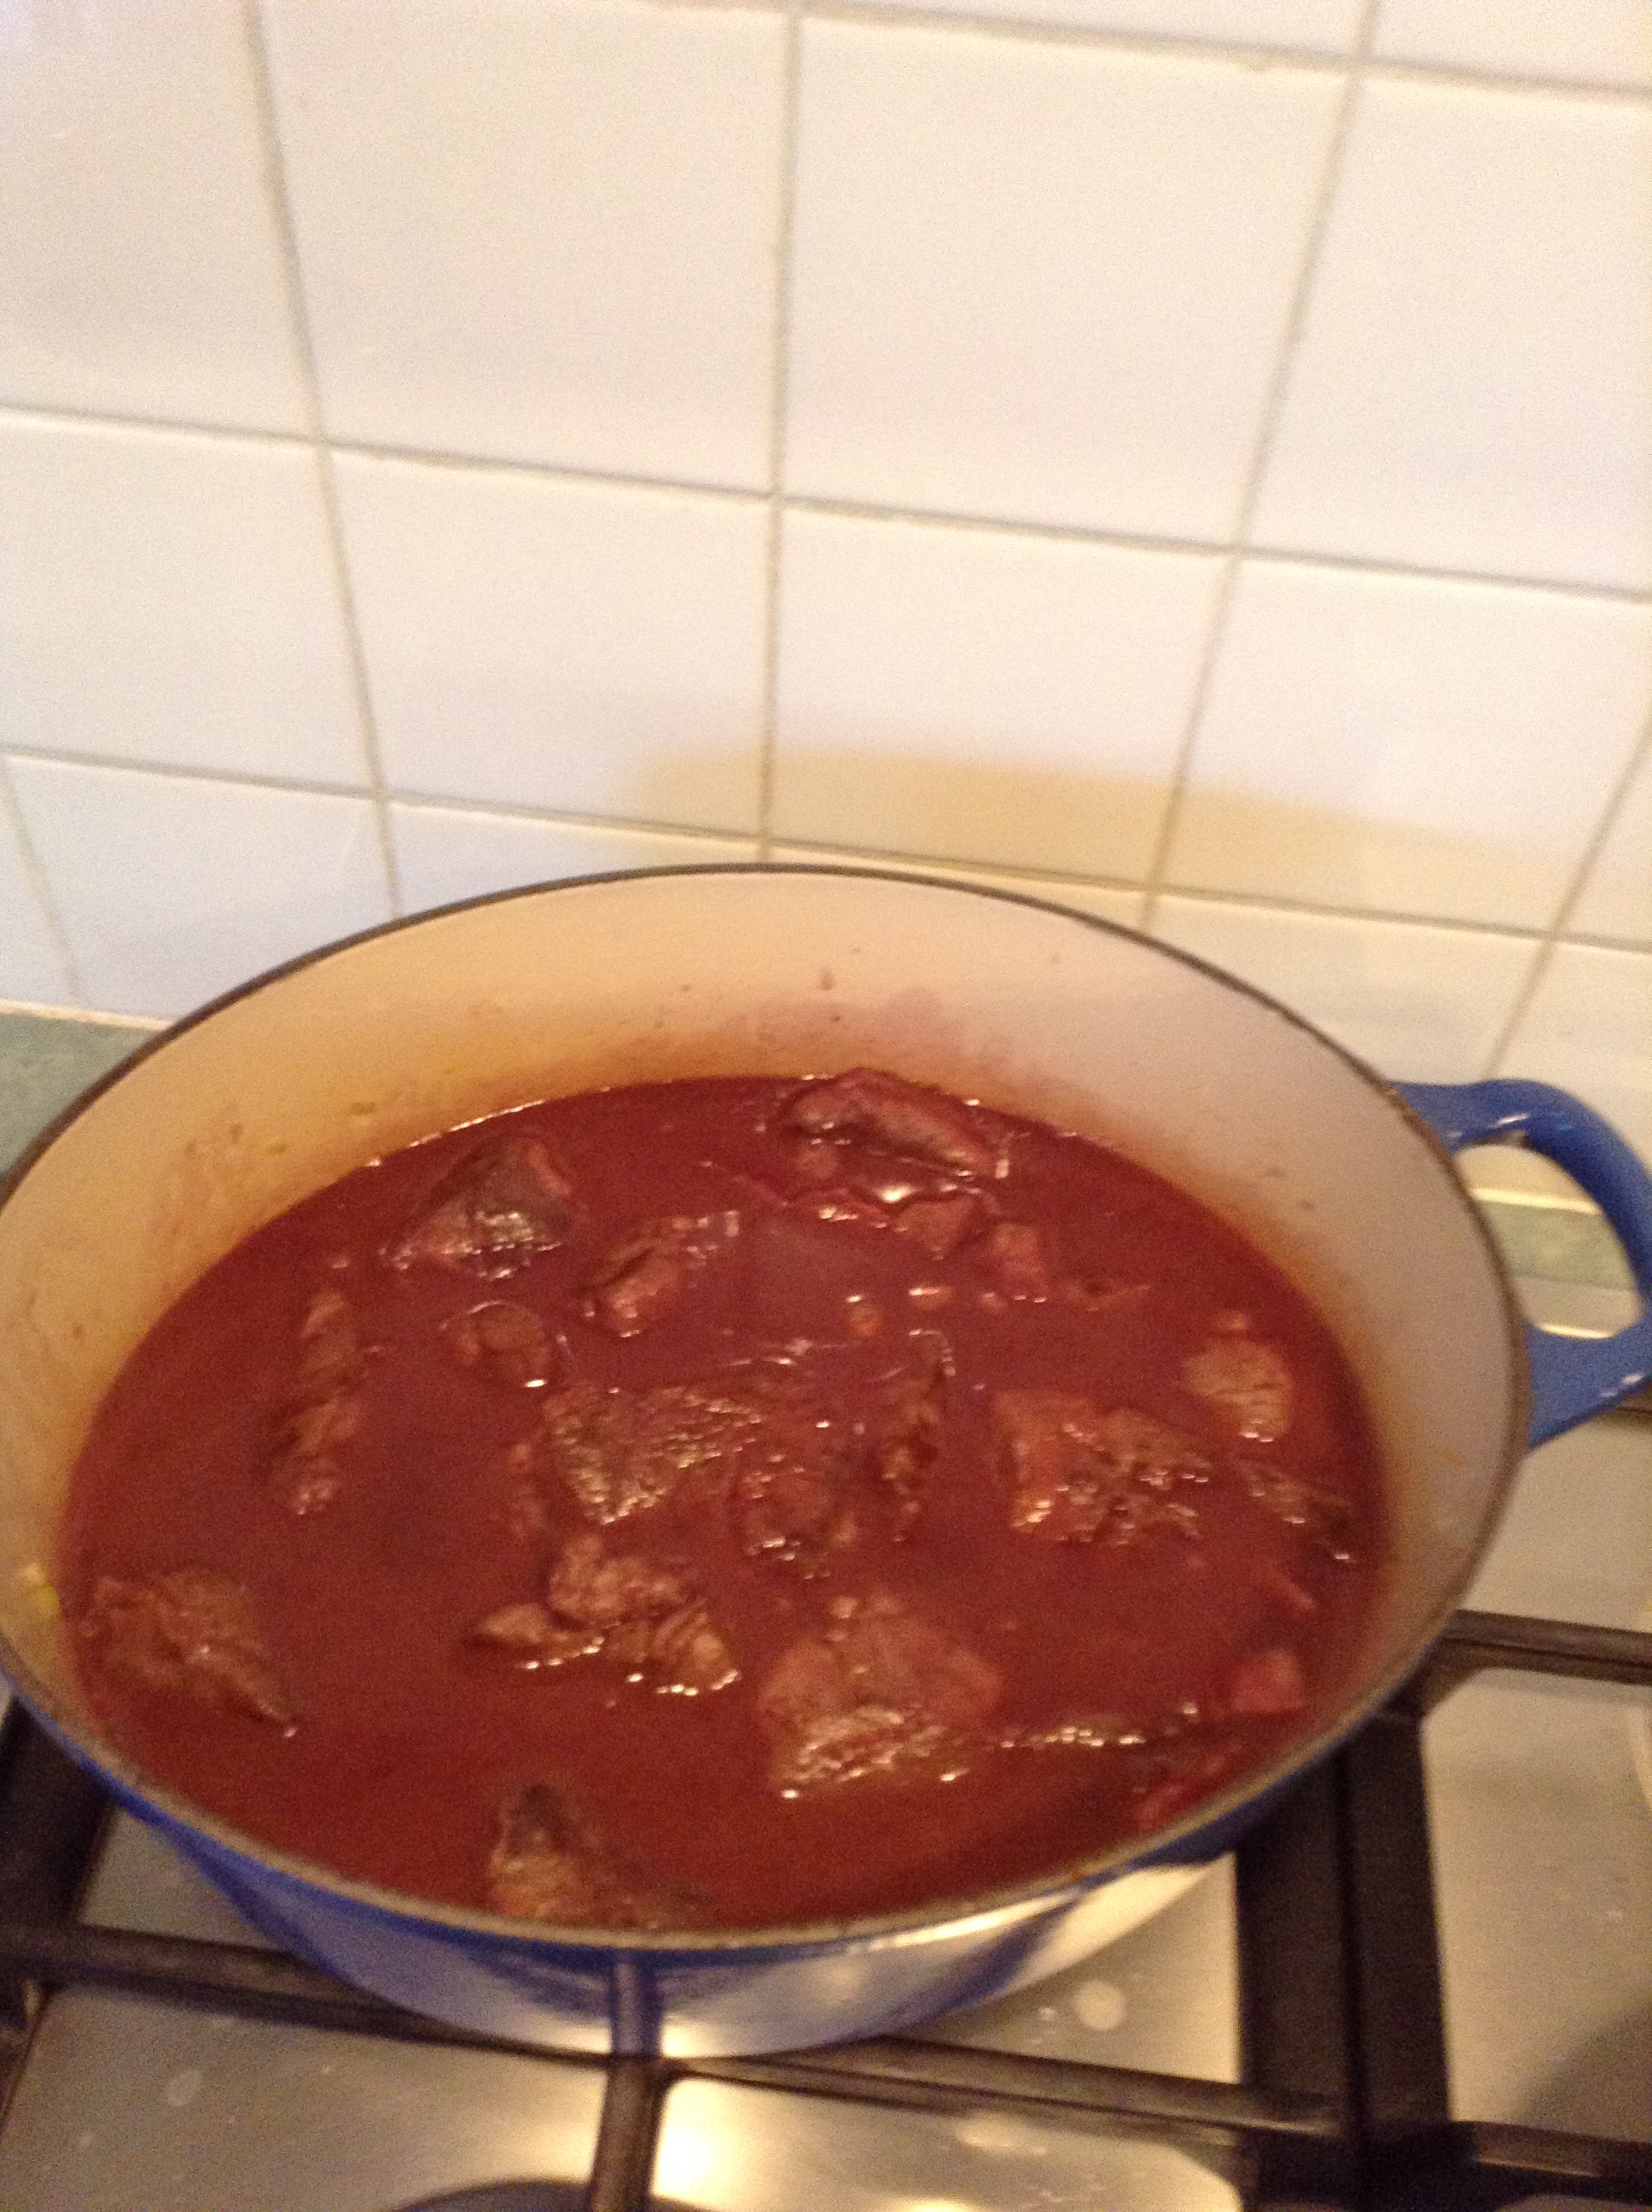
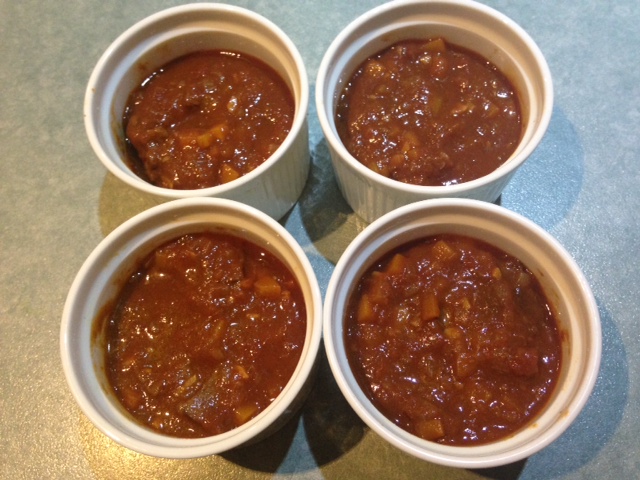
  1. The next day, take the pan from the fridge and remove the layer of fats from the top surface of the sauce, which will have become a firm jelly. (The photo below shows how the dish looked after Maggie had removed the layer of fat.)
  2. Warm the pan gently until the sauce is a liquid. Carefully remove the pieces of rooster, place them in a baking dish that will hold them snugly and cover with foil. Place the dish in an oven heated to 125C.
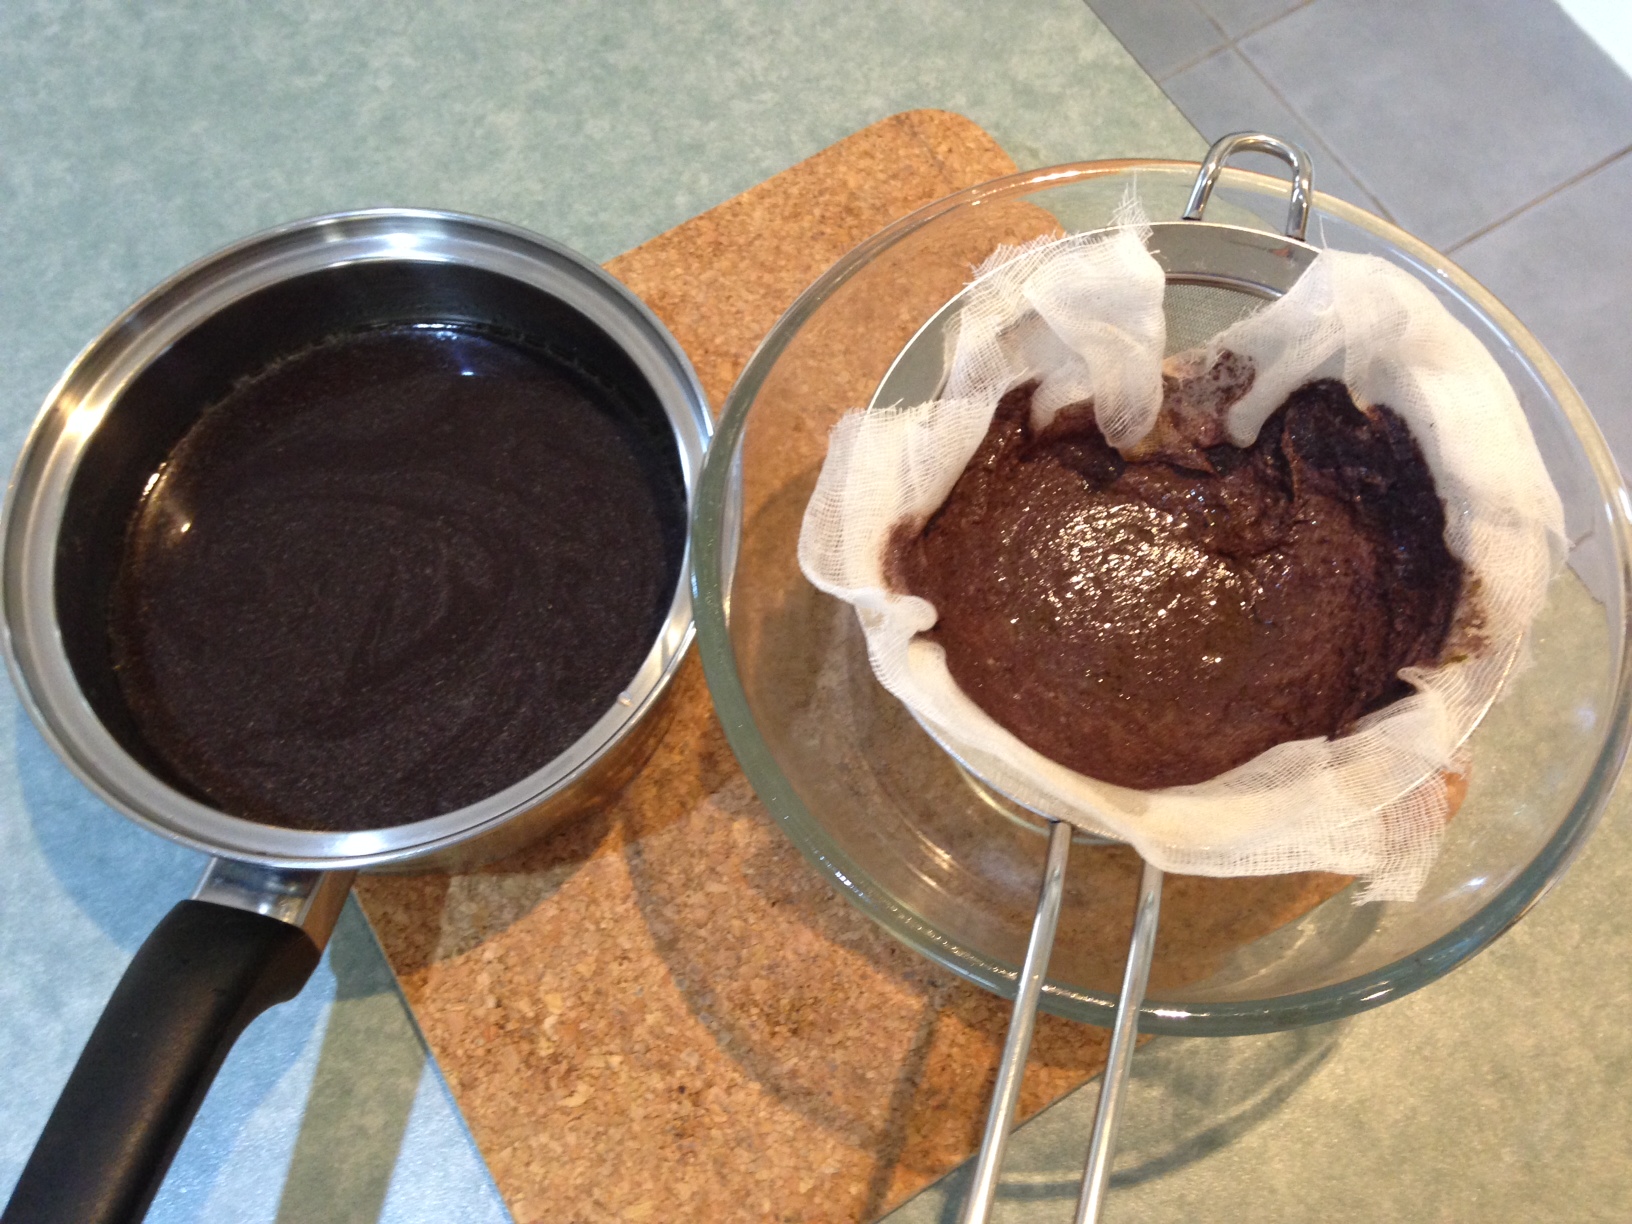
  3. Strain the sauce in batches, using a coarse sieve, pressing down on the solids with the back of a soupspoon to extract as much liquid as possible. Discard all the solids.
  4. Strain the liquid through a double layer of muslin to remove the finer solids (see second photo below). The resulting liquid will be clear, with some drops of residual fats on the surface. Transfer the liquid to a small saucepan and use a a teaspoon or two of cornflour to thicken it a little (the jus will not go cloudy).
  5. Assuming you have prepared some side-dishes of vegetables, you are now ready to serve a meal of Coq au vin.
After the fats have been removed

After the fats have been removed

Solids strained from the sauce

Solids strained from the sauce

Was it worth all that time and effort? Good question! Maggie and I are income-poor but time-rich, so we are happy to spend numerous hours each week preparing delicious food. I can think of dishes which deliver us more bang for the time-buck. That said, having done this once, we would work more efficiently next time. And, as our neighbours agreed, it was a truly attractive and delicious meal.

Posted in Cooking, Eating out | Tagged , , , , | 2 Comments

Travel-infused beef braises

While Maggie and I were travelling in Europe earlier this year, I ate four traditional dishes of braised beef: boeuf bourguignon (French), beef goulash (Hungarian), svickova omacka (Czech) and tafelspitz (Austrian).

Since returning to our own kitchen, we have cooked three of the dishes, with varying degrees of success. We plan to get to the fourth – the tafelspitz – in the next month or so.

In this post, I will tell you about these experiences and share a couple of recipes that we have adapted from various sources. (I appreciate this won’t appeal right now to people living north of the Tropic of Capricorn but here, 38 degrees south of the equator, it is mid-winter and our menu is dominated by braises, roasts and winter soups, eg we have made veal osso bucco, coq au vin and borscht in the last week.)

Boeuf Bourguignon

I enjoyed a serve of Boeuf Bourguignon as my main course when we dined at Chez Jeannette in the village of Fixin, at the northern end of the Cote d’Or. It was tasty enough and very tender but, for me, the most interesting feature was the jus; it was thin and translucent but still full of flavour. In our renditions of this famous dish, the sauce has been like a gravy – thick and cloudy.

A couple of weeks ago, as winter brought cold winds to our door, we cooked the dish for the first time since last winter. We made two changes to the recipe we had been using. Gravy beef replaced blade steak – it’s a textural thing – and we didn’t dust the pieces of beef with flour before browning them. As you might be able to see from the photo of my rather generous serve, the jus we produced had something in common with the one at Chez Jeannette.

We could have gone a step further – straining the vegetables out of the sauce – but we prefer to eat them as part of the meal. I presume that Chez Jeannette’s chef cooked the beef without adding some of the usual vegetables and then included them as separate items on the plate.

Chez Jeanette

Chez Jeanette

Chez nous

Chez nous

So, here is our recipe, a modified version of one we found on an American website. Accompanied by some fresh green beans and either a potato-and-cauliflower mash or some gently-boiled chunks of kipfler potato, this makes a satisfying mid-winter meal.

Ingredients

1 kg gravy beef, cut into pieces about 5cm
vegetable oil and butter
10-15 French (brown) shallots, peeled
80ml brandy
250g small mushrooms, halved
100g kaiserfleisch, coarsely chopped
1 onion, finely chopped
3 cloves of garlic, finely chopped
1 large carrot, diced
3 tsp tomato paste
2 tsp Dijon mustard
500ml dry red wine
small stick of celery        )
3-4 parsley stalks            ) tie together
3-4 sprigs of thyme         ) to make a
2 bay leaves                      ) bouquet garni
2 cloves                             )
salt and pepper

Method

  1. Heat 1 tbsp oil and 20g butter in a wide, heavy-based, oven-proof pan over moderate heat, and sauté shallots until golden. Remove shallots. (As you can see in the photos, we used our casserole dish and a non-stick pan to save time in steps 1 to 6.)
  2. Brown beef in three or four batches (to prevent crowding), adding more oil and butter as necessary. Transfer beef to a large bowl.
  3. Add brandy to the pan and boil for a couple of minutes, scraping off any bits from the bottom of the pan. Pour over beef.
  4. Heat 20g butter in the pan and sauté the mushrooms until glossy and tender; partly cover with a lid to retain flavour and moisture. Remove mushrooms from pan.
  5. Preheat oven to 140C.
  6. Melt 20g butter in pan and sauté bacon for two minutes. Add chopped onions, garlic and carrots and sauté, stirring until the onion is pale golden, about five minutes. Add tomato paste and cook, stirring for one minute. Add meat, brandy and juices, mustard, wine and bouquet garni, bring to a simmer and cover with lid.
  7. Transfer pan to oven and cook until meat is tender (about two hours, possibly longer, depending on tenderness of beef). Add shallots and mushrooms after 30 minutes.  Adjust seasoning after one hour.

Boeuf b 1   Boeuf b 2

Boeuf b 3   Boeuf b 4

Boeuf b 5

Beef goulash

When Maggie and I visited Salzburg while travelling in Central Europe, I enjoyed a very good plate of beef goulash at the K&K restaurant. This recipe, much modified from the original, produces a dish of comparable quality and is set to become one of our winter staples. Most goulash recipes include caraway seeds; we prefer to use cayenne pepper.

Ingredients

1-2 tbsp olive oil
500g gravy beef (weight after meat is trimmed), cut into 3cm pieces
salt and pepper
1 medium brown onion, finely chopped
2 cloves of garlic, finely chopped
1 medium carrot, diced
¼ cup each of chicken stock and beef stock
2-3 tsp sweet paprika
1 cup tomato passata
one or two generous pinches of cayenne pepper, to taste
300g potato suitable for mashing, eg Dutch Cream
15g butter
60ml milk
½ cup self-raising flour
50ml pecorino or parmesan
3 tsp chopped parsley

Method

  1. Heat a little oil in a heavy-based, non-stick pan over moderate heat, and brown the beef in two or three batches. Remove beef from pan and season with salt and pepper.
  2. Preheat oven to 150C (less if your oven cooks hot).
  3. Add onion, garlic and sufficient olive oil to the pan and sauté for about 3 minutes. Add carrot and sauté for a further 4 minutes. Transfer to an oven-proof baking dish. Add stock to pan, deglaze and remove pan from heat.
  4. Heat onion mix, add paprika and stir for 1 minute. Add browned meat, stock and passata and bring to the boil. Transfer to oven and cook for 1½ to 1¾ hours, stirring occasionally, until the beef is just tender. Adjust flavour with cayenne pepper after one hour of cooking. Remove goulash from the oven and uncover the dish so it can cool a little.
  5. As the beef is nearing its completion, peel the potato, cut into chunks and cover with plenty of salted, cold water. Bring to the boil and cook for about 12 minutes or until just tender.
  6. Drain the potato, return to the pan, add the butter then, when it has melted, add milk and mash until smooth. Transfer to a mixing bowl, add the flour, cheese and parsley and stir to combine well.
  7. Increase oven temperature to 170C and place an oven rack one level above mid-point.
  8. Divide the beef and its sauce evenly between 4 ramekins (ours are 10cm in diameter and about 7cm high. Use a small dessert spoon to add two or three dollops of the dumpling mix to each ramekin, spray with cooking oil and bake for about 20 minutes or until the dumplings are golden.

Goulash 1   Goulash 2

Goulash 3

Svickova omacka

I had never heard of this Czech dish until Maggie and I dined in the bar and cafe area of Hotel Belle Epoque when we were in Prague. It was quite delicious, especially the sauce, enough to result in a conversation with the cafe manager about how it is made.

Soon after we came home, I used Google to find some recipes for svickova omacka. I downloaded the one that most appealed to me and we had a go at it. It was moderately successful, although the sauce was well short of what I was served in Prague. We have worked out what we would do differently next time; that will be next year and if we manage to cook something blog-worthy, I will share the details.

Posted in Cooking, Eating out, Travel | Tagged , , , , , | 2 Comments

It’s apple pie season. Hooray!

One of my favourite times of the year is when there is a supply of fresh apples of the varieties that are best suited to making apple cakes or apple pies. For cakes, I use either Golden Delicious or Granny Smith, depending on the style of cake and the associated cooking time.  For pies and the like it has to be the latter variety and they are at their peak right now in my part of the world.

Our favourite apple pie is the classic French dish, Tarte tatin, which originated in the Loire Valley. The recipe we use is found in Great cooking classics, a cookbook published by The Australian Women’s Weekly. We haven’t modified the recipe so I won’t reproduce it here but it shouldn’t be too difficult to track it down in cyberspace.

The main ingredients for success in this dish are patience and care while cooking the wedges of apple in the caramel of butter, sugar and orange juice. We put the pan over a simmer mat, which spreads the heat more widely when cooking with gas. The first two photos show how the apple shrinks a little and, more importantly, the caramel slowly darkens.

Apples beginning to cook

Apple beginning to cook

Apple nearly finished

Apple nearly finished

In the next photo, the tart has been removed from the oven just before the pastry becomes too brown. Again care is needed to ensure that the oven is not so hot that the sugar in the pastry burns before it is properly cooked.

In this recipe, a semi-sweet shortcrust pastry is used. On the internet, I have been surprised to find that some recipes use sheets of bought puff pastry. That texture and flavour would not appeal to us at all.

Just out of the oven

Just out of the oven

And here is the finished tart. The colour is amazing, the caramel is gelatinous and the pastry is firm but not crumbly when you slice it for serving.

Turned out and ready to eat

Turned out and ready to eat

Much as we are satisfied with what we can produce using this recipe, it runs a distant second to the dish of Tarte tatin I was served at Hotel du Centre in Meursault. The filling was all about the apple. Yes, it had been cooked with some butter and sugar but they were in the background; somehow the pieces of apple were intact but ready to melt in the mouth. And the pastry was ethereal – a thin golden crust over a layer of soft, delicious “je ne sais quoi”!

As enjoyed in Meursault

As enjoyed in Meursault

It is in the hope of finding a way to reproduce something like this version that we have been googling tarte tatin. So far, we have drawn a blank. However, we think that we will try something derived from the batter for the Sicilian torta di mele. If that works, I will let you know.

Update: it did work, at the second attempt! This recipe produces a batter that comes out as a delicate biscuit after being baked.

Ingredients

1 egg
½ tsp vanilla essence
50g castor sugar
½ tsp baking powder
80g plain flour
50ml milk
35g melted butter

Method

  1. Whisk egg, vanilla and sugar together until pale and creamy (about 4 minutes). Add the flour and milk and mix briefly; then add the melted butter and combine thoroughly.
  2. Spoon the batter over the surface of the apple in the pan. Carefully use a fork or a small spatula to spread the batter evenly.
  3. Place in the oven at 150-160C and bake for about 20 minutes, or until the batter has become a cake consistency, is golden brown and firm to a light press.
  4. When the handle of pan is safe to touch, cross your toes, cover the pan with a plate and quickly invert the pan.
  5. Serve at room temperature, or slightly warmed, with a little cream.

Tarte tatin 6

Apple and rhubarb crumble

Another dish that we like to make during the wintry days of Granny Smith season is an apple and rhubarb crumble. Obviously, it is not as sophisticated as Tarte tatin but its flavours and textures are diverse and satisfying. Not everybody is a fan of rhubarb – I came to it late myself – but it does provide another element of flavour and a vivid hue. The latter is enhanced by the grated ginger, one of our modifications to the original recipe.

Ingredients

1 bunch of fresh rhubarb
3-4 Granny Smith apples, depending on size
¾ cup raw sugar
1 lemon
3cm fresh ginger
¾ cup plain flour
½ cup brown sugar (or use Demerara sugar for a crunchier result)
½ tsp ground cinnamon
70g cold butter
¼ cup rolled oats
¼ cup shredded coconut

Method 

  1. Trim rhubarb of leaves, sponge off any dirt and cut into 3cm pieces. Peel, core and roughly chop apples. Peel and grate ginger.
  2. Juice lemon and add juice and raw sugar to a wide pan over medium heat. Add apple and ginger and cook, stirring, for 3 minutes. Add chopped rhubarb and cook for 5 minutes or until rhubarb is tender but still holds its shape.
  3. Use a slotted spoon to transfer the cooked fruit to a 2 litre capacity ovenproof dish. Leave about 25% of the cooking liquid behind in the pan (we then use it as a sauce with crepes).
  4. Preheat oven to 170C.
  5. While the fruit cools a little, combine flour, brown sugar, cinnamon and diced butter until the mixture resembles breadcrumbs. Stir through rolled oats and coconut and sprinkle evenly over fruit.
  6. Cook in oven for 30 minutes or until golden and bubbling. Serve with cream or ice cream.

The first photo shows the true colour of the cooked topping; the second shows the profile of the dish. Writing this has given me an appetite for another piece, so I will sign off now!

Crumble 1   Crumble 2

Posted in Cooking, Eating out | Tagged , , , , , | Leave a comment