Indian summer quail

So, to finish posting about our weekend of late-summer cooking, here is the story of what we did with the two quail that we brought home from Donati’s.

Many of the world’s cuisines include dishes made with quail. Until now, we have gone with European recipes: a saltimbocca style with sweet and sour pears; an involtini method with Italian flavours; and roast stuffed quail with some Mediterranean influences. This time, we wanted to barbecue the quail. A google search didn’t turn up anything mouth-watering, so we turned to Stephanie Alexander and found something interesting that would take us outside our usual flavour palette.

The recipe used a paste made from coriander seeds, black peppercorns, cardamom pods, cloves and cumin seeds, to be ground and then combined with curry powder, salt, melted butter and grated ginger. We substituted powdered cardamom and ginger for the raw materials, reduced the volume of pepper – many spice mixes overuse this ingredient – and used butter that was quite soft enough already on a warm summer’s day! Tasting it, I found it to be a bit astringent, so I added a little dark brown sugar and that was the paste sorted.

Meanwhile, Maggie butterflied the quail and tidied them up. She placed some of the paste on the breast meat under the skin; the balance was reserved for basting the quail while it was grilling on the barbecue. For this dish, we kept the gas flame fairly low once the Weber had heated up and that worked – the quail were cooked through but only lightly charred.

For a side dish, Stephanie recommended some fried coconut. This involves garlic and spring (green) onion (scallion), sliced and fried in vegetable oil over medium-high heat until just starting to colour. Then you add some ground coriander and cumin and desiccated coconut, toss and fry briefly and transfer to a serving bowl before it overcooks. We preferred to use shredded coconut; otherwise, the recipe worked well.

The meal needed something more to round it out and there was a big ripe tomato from our Greek neighbours giving out a “pick me, pick me” vibe. In my well-thumbed book of curries-for-dummies, I found a recipe for a cooked tomato sambal. The tomato was peeled and then sambalised, with some coconut milk added for the occasion. And, at the last minute, I cooked some Basmati rice.

By the time Maggie was plating up our Sunday lunch, we were too hungry to pause for photos. The ugly duckling look of one of the two plates – yes, two plates – of leftovers doesn’t do justice to the dish but I can assure you that it was thoroughly delicious and all the components worked well together.

photo


Posted in Cooking | Tagged , , , | 1 Comment

Late summer seasonal saucery

We’re into the last official month of summer here in Melbourne and we’ve been told to expect a very warm end to the season. That’s not unusual; it’s just that this summer has been un-seasonally mild, yet irritatingly dry (if you are trying to grow tomatoes).

As with summer, so with the supply of some of the season’s fruit and vegetables. So, over the second half of last week, we got busy making cakes, condiments and meals that incorporate summer goodies while they are still available in peak condition.

We began with some blood plums grown by our friendly neighbours in the garden of their holiday-home at Dromana, on the Mornington Peninsula. I have made this cake once or twice each plum season for most of the last 15 years, using a barely-modified recipe by Stephanie Alexander. Her recipe goes into a 28cm round spring-form tin; I bake half as much in a 20cm tin, as it is easier to achieve even cooking in a domestic oven. The fresh pieces of plum help keep the cake moist for several days and it lends itself to being gently warmed and served as dessert with a dollop of cream. We have entered into a long-term barter-trade deal with Janet & Gary!

Plum cake

A couple of days later, we headed off to our favourite farmers’ market at Collingwood, only to discover we were one week early! Serves us right for skipping that one for a few months. Anyway, finding ourselves in the inner-suburbs, we got back into our car and headed towards Lygon St, Carlton, the home of Donati’s, one of our city’s finest Italian butchers (they also have fine Italian opera playing in the shop). For the modest sum of $25, we walked out with two quail, one spatchcock, four thick rashers of irresistible bacon and some of the first veal escalopes of the new year.

Next, to an actually-open farmers’ market we had spotted a short distance away, where we picked up some lovely fresh produce, including aromatic strawberries, some of the last peaches of the season and some apples that would go well in a waldorf salad. It was not yet 9am on a Saturday, so we took the opportunity of a fuss-free drive through the centre of Melbourne, then down the tree lined expanses of St Kilda Road before arriving at Toscano’s to tick the rest of the boxes on our shopping list.

The headline acts of our haul from Toascano’s were a large bag of ripe red saucing tomatoes and a kilo of ripe black figs @ $8/kg. We are very fond of figs but the early-season price of around $40/kg is beyond the limits of our devotion.

Most of the figs were destined for our annual batch of fig and ginger jam, but I put one aside for an idea that had taken root in the back of my mind earlier in the day and then developed further at the prospect of roasting the spatchcock for dinner. We had some baby beetroots nesting in the crisper and I thought we could do something special with them.

I covered the raw, unpeeled beetroot with water in a saucepan, brought it to the boil and let it simmer for 27 minutes; this was enough time to cook the beetroot evenly to al dente tenderness. Meanwhile, I scanned the ‘what goes with’ list in the beetroot section of The Cook’s Companion and tossed some ideas around with Maggie. Once cooked, the beetroot were placed in some cold water, peeled by hand and chopped into chunks. Then we tossed them with some Dijon mustard, a little honey and some pieces of walnut that I had toasted and rubbed. We placed this mixture in the base of a small foil roasting dish and covered it with a layer of breadcrumbs to which we had added some olive oil, seasoning and chopped fresh parsley and chives. And then came the fig – sliced crosswise and laid on top of the breadcrumbs.

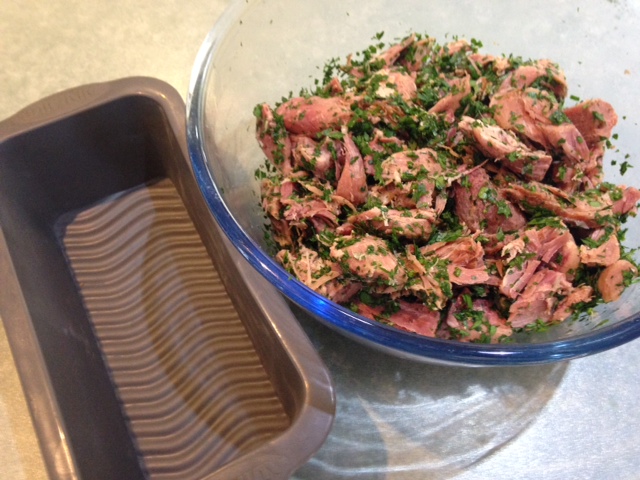
The beetroot was roasted in the Weber alongside the spatchcock, which was simply flavoured with a herb and garlic butter. By the time Maggie was plating up our dinner, we were too hungry to take any photos; the one below is of a dish of leftovers in which you might just discern a slice of the fig at right-centre. All the flavours and textures worked deliciously together, including the sweetness of the figs and the beetroot. If the fig season lasts a little longer, we will make this again. Probably twice!

Beetroot and fig

Come Sunday, we were ready to play preserving with peaches and figs. Fig and ginger jam is our favourite topping on the toast we enjoy on weekend mornings, when we make a pot of black Irish Breakfast tea and read the newspaper in bed. If you look closely at the label on the jar, you will see that we call it FAGJIM; this is an acronym for ‘fig and ginger jam I made’. FIGJAM is another species of acronym altogether!

Ingredients

900g ripe black figs
¾ cup orange juice
¼ cup lemon juice
2 tbsp sweet sherry
810g sugar (50:50 raw and white)
80g fresh ginger, peeled and grated

Method

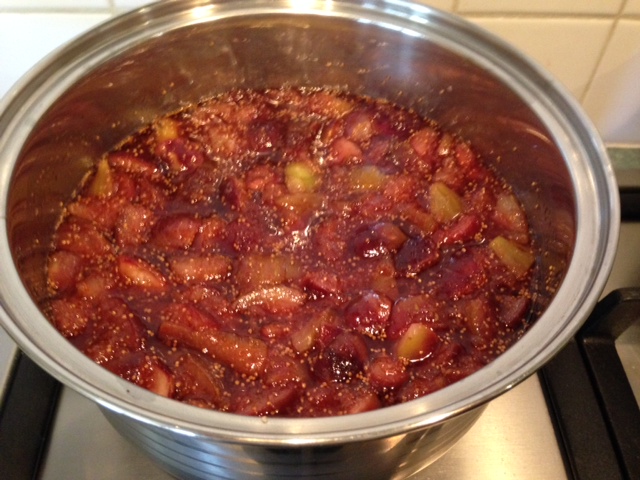
  1. Cut stems off figs and chop the figs coarsely.
  2. Place the figs in a large pan with the orange juice, lemon juice and sherry. Bring to the boil, reduce the heat and simmer until the figs are tender (about 10 minutes).
  3. Meanwhile, warm the sugar gently in an oven. (This is not a critical step, especially in warm weather, but it does speed up the cooking process.)
  4. Add the sugar and ginger to the pan and stir over a low heat until the sugar dissolves. Increase the heat and boil rapidly, uncovered, until a little spoon of jam jells on a chilled saucer, approximately 25 minutes.
  5. Pour into sterilised jars and seal.

Fagjim 1   Fagjim 2

After a bath, the jam pan was ready for Maggie to make a batch of spicy peach chutney, one of two condiments we serve with pork that has been roasted or grilled. (The other is a chutney made with pear and ginger.)

Ingredients

310ml white wine vinegar
1kg just-ripe, freestone yellow peaches, halved and chopped
1 green apple, peeled, cored and chopped
½ cup (95g) dried peaches, chopped
2 tsp ground ginger
4 green cardamom pods and 1 cinnamon stick, secured in muslin
<¼ tsp dried chilli flakes
2 cups (400g) brown sugar

Method

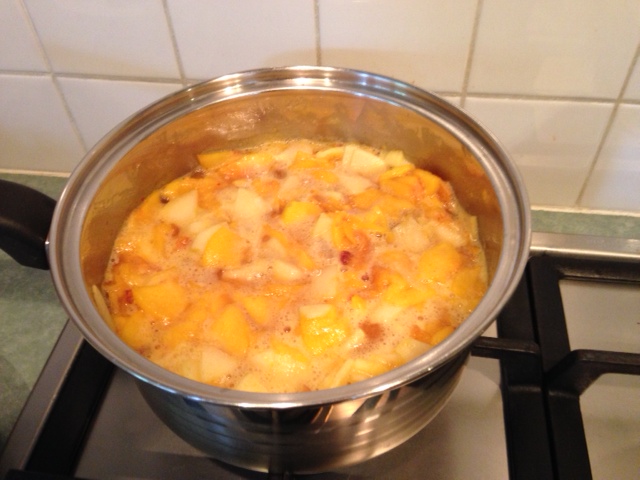
  1. Place all ingredients, except the sugar, in a large saucepan and bring to the boil.
  2. Reduce heat to maintain a busy simmer and cook, stirring occasionally, for about 30 minutes (the peach should be tender).
  3. Add the sugar, stir until dissolved and simmer for a further 40 minutes or until the mixture thickens.
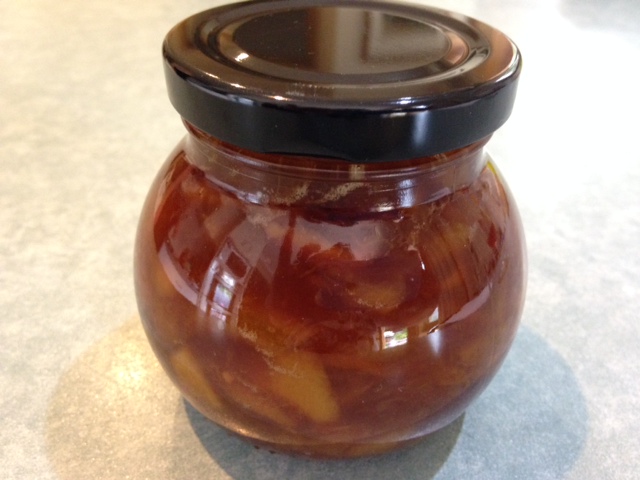
  4. Use a clean cream jug or similar to decant the relish into warm, sterile glass jars. Seal immediately.
  5. When the jars are cool enough to handle, transfer them to a fridge for long-term storage (18 months or longer).

Peach chutney   Peach chutney 2

Peach chutney 3

One of the remaining peaches was cut into segments and tossed with some fresh raspberries and a generous glug of our homemade limoncello. No, we don’t own a still, we begin with store-bought vodka. The farmers’ market strawberries were set aside for one last dish of Strawberries Romanoff – there are still plenty of berries available but we have reached our quota of mascarpone for this season!

Finally, Maggie cooked some of the ripe tomatoes down and set some of the rich sauce aside to be used when we made veal parmigiana for the evening meal. Phew!

As for the quail, that’s an interesting story for another day.

Posted in Cooking | Tagged , , , , , , | Leave a comment

Last of the ham goes into our first terrine

Some followers of this blog will know that Maggie and I spent three full days and nights in the Cote d’Or region of Burgundy in April 2014. To recap: we spent a sinful amount of money on food and wine.

One of the many dishes we enjoyed was a ham and parsley terrine, a traditional Burgundian item. We had it on three occasions: as an amuse bouche at La Grilladine; as an entree at the restaurant Chez Jeannette; and as part of a mixed plate of cured pork meats at a small, quiet hotel in the village of Epinac. They were all good but the third version was the best.

We resolved that we would attempt to make this dish ourselves. Soon after we returned home, I found an online recipe and saved it to our desktop.

We could have made it during our winter months. Ham hocks are in plentiful supply at that time of the year and are much in demand for preparing soups and casseroles. Indeed, we made some pea and ham soup last winter. But a terrine is a dish served cold and suited to casual, warm weather dining. So, we put the project on hold.

Then came Christmas and our decision to buy a whole leg of ham for the festive season; inter alia, we planned to use the bones and some remnants of meat to get our terrine started. However, when we studied the recipe closely, we discovered that we might need four ham hocks to yield enough meat. And that was a problem, as hocks aren’t supplied to butchers and delicatessens in summer because nobody is making pea and ham soup and, apparently, nobody wants to make a traditional Burgundian ham and parsley terrine. Except us!

Luckily, we shared our frustrations with our butcher. He offered to remove the bone from a leg he was using to cut slices for post-Christmas ham junkies; and he suggested we try our luck at the deli a few doors along the street. The deli did have a hock leftover from a leg of ham and it was sitting in their meat cabinet waiting for a new owner. $5 and it was ours. That gave us plenty of bone and meat.

If you visit the recipe, you will find that the bones need to be simmered for 3 hours in water to which various flavourings are added. After we had done that and let the ham cool in the liquid, Maggie removed the bones and most of the meat. Then we strained the liquid to remove the solids – through a coarse sieve at first and then through a fine sieve. We covered the reserved meat and cooking liquid and refrigerated them overnight.

Next day, Maggie picked over the meat to tidy it up and we were left with exactly the recommended one kilogram! All the parsley needed to make 1 cup of chopped leaves was picked from our garden – we have a spot that produces Godzilla-like plants every year. And then we needed some jelly, to hold the terrine together.

Now, the recipe suggests that you combine some softened gelatine leaves with a cup or so of the deglazed cooking liquid, warmed in a saucepan. However, because one of the ham hocks still had its skin on, the cooking liquid was thoroughly gelatinous already. So, we put the gelatine back in the pantry for another day; we also found that we needed to pour about one and a half cups of the cooking liquid into the packed terrine.

Ham terrine 1   Ham terrine 2

Ham terrine 3   Ham terrine 4

How did it turn out? Well, it certainly looked the part and the texture and flavour were good. It went beautifully with some of Maggie’s green tomato pickle. Next year, we would add the jelly progressively as we pack the mould; it hadn’t made it to the bottom in sufficient quantity. Also, we would combine a bit of Dijon mustard with the ham and parsley, to make the flavour profile more complex. Otherwise, a mighty fine first attempt that gives us the confidence to consider making some other types of terrine.

Posted in Cooking, Travel | Tagged , , | Leave a comment

Calamari: the collector’s edition

Calamari is one of our favourite seafoods and we always have some in our freezer – caught locally, bought fresh and trimmed to our liking by Maggie. We have cooked calamari as the feature ingredient – salt and pepper style, marinated then grilled on the barbecue, or crumbed rings deep-fried. And we have combined it with other ingredients in meals of paella, pizza or pasta.

Each of these has been delicious and satisfying in its own way, but not one of them could be described as elegant or classy. That’s all changed now, thanks to a recipe by Patrizia Simone, for what she calls ‘deconstructed baked calamari’. Although we made some changes to the recipe, the ideas all came from Patrizia, so I will describe the method rather than codify it.

Calamari 3

We began with a clean whole tube of calamari that we had bought from a very reliable fishmonger. The tube weighed a tad over 300g, which turned out to be enough to provide each of us with an evening meal and a light lunch.

Maggie cut the tube in half lengthways, tidied up the inner surfaces and lay one piece skin-side down on a cutting board. Using her trusty sharp, straight-bladed Toledo-steel knife, she cut pieces about 2cm wide, cutting on an angle then sliding the knife to separate each piece from the skin. (It is the skin shrinking when it comes into contact with heat that causes pieces of calamari to contort.)

When she was finished, we placed the pieces of calamari in the fridge while we completed the preparations. We melted about 50g of butter in a small saucepan and added 3 cloves of garlic, prepared on the amazing grater our friend Janet gave Maggie for Christmas. After a couple of minutes, we added about half a cup of fresh breadcrumbs, 40ml of chopped herbs – parsley, chives and marjoram – picked fresh from the garden, stirred briefly and removed the pan from the heat. Then we seasoned the herb mix generously with salt, black pepper and a little cayenne pepper.

Groovy garlic grater

Groovy garlic grater – thanks Janet!

While the oven came to 180C, Maggie lined a roasting pan with baking paper, placed the pieces of calamari on the paper, sprinkled the herb mix over the top, placed quarters of our home-grown cherry tomatoes around the perimeter and then a drizzle of olive oil over the top of everything.

Patrizia’s recipe indicated that we should bake the calamari for 5 minutes at 200C. That’s fine if you have a commercial oven but we never try to get ours cranked up to 200C and we have to allow for the fact that the oven temperature will drop initially as the pan and its contents warm through. So, we found that about 10 minutes was long enough to cook the calamari without making it too chewy.

Calamari 1   Calamari 2


Posted in Cooking | Tagged , , , | Leave a comment

Canape caps

When Maggie and I married in December 2006, we celebrated by sharing a seven-course degustation-style lunch with my parents and nine special friends. The meal was prepared and served in our home, with the assistance of three young friends and according to our recipes. Three light courses of seafood, accompanied by French bubbles and Australian white wines, were followed by a warm entree of stuffed mushrooms.

We had developed this dish earlier in 2006 by reworking a Bill Granger recipe for coating a lamb rack using breadcrumbs and various flavourings. Our recipe went unaltered until just before Christmas 2013, when we hosted a small finger-food gathering of the ‘lifestyle’ team I support as a volunteer at a nursing home. One of the workers is gluten-intolerant, so we decided to substitute well-cooked brown rice for the breadcrumbs and discovered that we preferred it made that way.

We use the mushroom variety known as Swiss Brown and the recipe can be used with small, medium or large mushrooms. My preference is the middle of the range, providing me with a quick-to-reheat snack to settle between-meals hunger pangs that might otherwise impel me towards sub-nutritious alternatives.

Ingredients

16-20 small mushrooms or 10-12 medium-sized mushrooms (approx 5-6cm in diameter) or 4 large mushrooms (aka portobello mushrooms)
1 cup well-cooked brown rice (or fresh breadcrumbs)
50g prosciutto, chopped
1 tbsp finely chopped parsley
1 tbsp chopped chives (or 2tsp each of chives and fresh sage)
1 clove garlic, crushed or grated
1 tsp Dijon mustard
1 tbsp olive oil
50g fetta
plenty of black pepper
extra olive oil

Method

  1. Place all stuffing ingredients except fetta and pepper in a bowl and mix well to combine.
  2. Crumble fetta by hand into the stuffing mix and stir well.
  3. Check for seasoning and add pepper to taste.
  4. Trim the stalk of each mushroom to a little higher than the mushroom rim.
  5. Line the base of a shallow baking dish with baking paper; the dish should be 50% larger than the space required for the mushrooms.
  6. If using small mushrooms, preheat oven to 150C.
  7. Pour some extra olive oil into a shallow bowl, dip each mushroom cap in the oil and place cap down in the baking dish.
  8. Gently pack each mushroom with the stuffing.
  9. If using small mushrooms, place dish of mushrooms in a cold oven and bake for 15-20 minutes or until stuffing is golden brown and barely crisp. If using larger mushrooms, place them in a cold oven, bring the temperature up to 150C and bake for a further 15-20 minutes (this technique helps cook the thickest part of each mushroom).
  10. Cool slightly and serve

This batch of stuffed mushrooms was cooked in our Weber Q, set up for baking, and the mushrooms were placed directly onto the trivet.

Mushrooms 1   Mushrooms 2

Posted in Cooking | Tagged , | Leave a comment

Iris turns heads, Iris turns one

On 17 January 2014, I became a grandparent, when Iris was born to my son, Julian and my daughter-in-law, Sara. To celebrate her first birthday, Julian and Sara held a party at their home in Healesville last Saturday afternoon. A dozen or more of their friends went along, as well as at least half a dozen children ranging in age from one to the teens.

Iris, not quite two days old

Iris, not quite two days old

We arrived ahead of the throng, for some family time before things got lively; and to meet Stevie, a female labora-doodle pup who joined the family three weeks ago. (Stevie, named after the great Stevie Nicks, will be spending two weeks with us in February, while Sara and Iris catch up with family and friends in Hawaii and Oregon, respectively. It will be neat for us to have a dog in our home again.)

012 birthday 1   012 birthday 3

We gave Iris two books and we gave her parents the blocks that we had made by a stall-holder at the Red Hill Market. Earlier in the day, Iris had received birthday wishes, via Skype, from Sara’s mother in Anchorage, Alaska and from Julian’s mother in Albany, Western Australia.

IMG_0257

The weather was very clement – some sunshine, temperature in the low 20s (Celsius) and a light breeze. There was party food for the kids and the big kids; bubbles from France, Yarra Valley, bubble-making toys and the Schweppes factory; and lots of colourful balloons and pennants.

Maggie and I took some chicken and mayonnaise ribbon sandwiches and one of Sara’s favourite cakes, our chocolate, almond and hazelnut torte. Iris wolfed down two of the sandwiches and a few cherry tomatoes from our garden. Then she was ready for cake!

One of Sara’s friends and her three sons – the boys adore Iris and are very caring of her – had made a big birthday cake with pink icing. Iris was very happy with the icing!

Then it was time for her to say goodbye to Pop and Gran. Just to reassure you, no, she wasn’t trying to pick my nose! For the last two months, she has been busy pointing to objects – animate or otherwise – wanting to have her powers of observation noticed and to be told the name of the object. My nose and the buttons on my shirt are regular targets of Iris’ pointer.

012 birthday 7   012 birthday 9

Posted in Home life | Tagged , | Leave a comment

Buffalo green-filled

The title of this post is an obscure pun on the dish we cooked last night and the name of a 1960s North American band formed by Neil Young – one of my top three musical heroes – and the talented egotist Stephen Stills. So, my apologies for being simultaneously corny and opaque when one such sin should suffice.

A month or so before Christmas, I received a tweet that told me buffalo meat was available at Cester’s, our preferred supplier of duck, quail, spatchcock and goat. We’d never cooked a meal of buffalo, so we decided to give it a go and bought about 500g of buffalo fillet, cryovac-protected and frozen. Late last week, with our menu of festive food tapering towards normal summer programming, we decided to go to work on the buffalo.

But what to cook?

A search of cyberspace was not very illuminating, mostly throwing up recipes for buffalo burgers and the like. To be fair, one of the virtues of buffalo meat is its low fat content, so you do run the risk of cooking up a plate of something dry and unappetising. So, a burger appeals as a safe option, but Maggie and I don’t do safe in the kitchen! Well, at least, not when planning a meal.

In light of our recent meal of beef wellington, it was tempting to give the buffalo fillet much the same treatment, using leftover sheets of the puff pastry. But close-on-the-heels-of-success repetition is both safe and palate-dulling. Then I remembered another dish we make from time to time – well, every couple of years, for reasons that will soon become as clear as melted butter – using a piece of beef fillet. Maggie calls it her ‘green’ steak; in the printed collection of our favourite recipes, I have given it the more wannabe-cheffy moniker ‘roast eye fillet au verd’.

A plate of buffalo fillet 'au verd' and companions

A plate of buffalo fillet ‘au verd’ and companions

Ingredients

1/2 kg fillet of buffalo (or beef)
2-3 spring (green) onions, sliced
2 tbsp dry white wine
60g butter, softened
3 tsp parsley, finely chopped
2 cloves garlic, crushed
1 tsp Dijon mustard
salt and pepper, to taste
40ml breadcrumbs
1/4 cup grated gruyere cheese

Method

  1. Heat a non-stick pan until very hot. Add the piece of meat and turn on all sides until the outside of the flesh is brown. Remove and allow the meat to cool (this prevents loss of juices during step 5).
  2. Place the spring onion and white wine in a small saucepan and cook over medium heat until the wine has almost evaporated and the onion is soft.
  3. In a bowl, use a fork to cream the butter with the parsley, garlic, mustard, salt and pepper. Add the breadcrumbs and cheese and stir to combine. Mix in the spring onion. (This butter mix can also be used when cooking escargots or lobster tails.)
  4. Preheat oven to 170-175C (no hotter or the butter will burn).
  5. Leaving the base of the fillet intact, cut into the flesh at >1cm intervals. Spread some of the butter mix between each slice, as well as along the top and sides of the fillet. Tie some string around the sides of the fillet lengthways to hold it together.
  6. Place fillet on baking paper in an oven-proof tray into which the fillet fits comfortably. Cook in the oven for 20 to 35 minutes, according to the thickness and your own taste. Remove, cover with foil and rest for 5 to 10 minutes.
  7. To serve, remove the string and cut the slices through.
  8. The pan juices and resting juices, which include much of the butter, can be saved and used when mashing some potatoes.

To complete the dish, we added some whole mushrooms, seasoned, tossed in olive oil and roasted alongside the buffalo; Dutch carrots, peeled and cooked by reduction method in water, a little sugar and a little butter; fresh green beans; and some of our homegrown kipflers, boiled until just cooked. There was enough meat for three adults, four at a pinch.

What was is it like? As you would expect, similar to beef; soft but not melt-in-the-mouth, possibly a lighter flavour; but I’d need to taste them side by side to be sure. No obvious wow factor, but I enjoyed the plate of food very much, believe we made a good decision about ingredients and method and would do it again without making any changes.

Buffalo 1   Buffalo 2


Posted in Cooking | Tagged , | 1 Comment

Possum pickle makes Maggie see green

Every summer, we grow tomatoes in our kitchen garden, with varying degrees of success. The summer of 2013/14 began cool and damp and most of the tomatoes we planted struggled to produce any fruit; it didn’t help that I underfed them – a lesson painfully learned!

This season we have done much better. We began, as for every year, with cherry tomato plants in pots, so we could move them around to gain maximum sunlight. Next, we put a couple of plants in a corner bed that gets plenty of sunshine from mid-Spring onwards. The next pair went into a side bed that is too shady until late in Spring and the last two – late-ripening varieties – were planted after we had dug up the last of our kipfler potatoes and refreshed the soil.

So far, we’ve had a wonderful crop of three varieties of smaller tomatoes, followed by an emerging crop of two larger varieties. However, as you know, there’s more to growing tomatoes than giving them a good supply of sunlight, nutrients and water. I’m talking protection from predators and, in our ‘hood, that means cabbage moth caterpillars, birds and possums. We manage the grubs using a natural pesticide and accept that we might lose a small amount of fruit; and damage from birds is minimised by daily harvesting and my efforts as a living, fire-breathing scarecrow. But defeating the possums – a nocturnal and protected native animal – is much more of a challenge.

Early last week, we discovered that our most productive large-fruit tomato had, in turn, been discovered by members of the local possum community. We considered using strings of battery-powered LED lights to deter them but, with a forecast of several days and nights of showers and rain, this didn’t appeal as a reliable strategy. So, we decided to cut our losses, harvest all the green fruit and convert most of it into Maggie’s green tomato pickle, a product that is VERY popular with family, friends and Maggie’s work colleagues.

We began with 3kg of green fruit and produced eleven jars of pickle, a condiment that goes particularly well with various cheeses, ham and corned beef.

                  Tomato pickl 1           Tomato pickl 8

Filled jars ready for distribution

Jars of green tomato pickle ready for distribution to family, colleagues and friends

Ingredients

3kg green tomatoes
1kg onions
small handful of salt
750ml white wine vinegar
1kg sugar
½ tsp pepper
3 tbsp curry powder
3 tbsp mustard powder

Method

  1. Chop the onions and tomatoes into a bowl, sprinkle with salt, mix well, cover and leave to stand overnight.
  2. Next day, rinse and drain thoroughly and tip the solids into a large saucepan. Add 600ml of the vinegar, bring to the boil and cook for 10 minutes.
  3. Add the sugar, bring back to the boil, stirring, and cook on a high simmer for one hour, stirring often.
  4. Mix the remaining vinegar with the dry ingredients, add to the pan and stir until well combined.
  5. Boil for 5 minutes, then bottle and seal. Stored in a good fridge, the pickle will keep for 18 months, possibly longer.

Tomato pickl 2   Tomato pickl 3Tomato pickl 4   Tomato pickl 6   Tomato pickl 5   Tomato pickl 7

Posted in Cooking | Tagged , | Leave a comment

Spiced lamb & fetta croquettes

I have written before about roasting a portion of boneless leg of lamb. This post covers the other use we make of lamb leg meat – minced, flavoured and formed into croquettes.

We have had our electric mincer for several years and we make good use of it to mince meat for various purposes, as well as fresh horseradish.

Horseradish 1   Horseradish 3

We still buy some minced meat from our butcher but, for a few favourite recipes, we use our own mincer to integrate other ingredients with the meat.

Last night we did just that as we prepared spiced lamb and fetta croquettes. These go very well accompanied by oven-heated Turkish bread plus some or all of tomato, spinach leaves and tzatziki.

Previously, we have cooked the croquettes in a non-stick pan with a little olive oil but we decided to bake this batch in the Weber Q and partnered them with some stuffed Dutch Cream potatoes and a simple dressed salad of cucumber and home-grown cherry tomatoes. It took about 25 minutes to cook the croquettes at about 180C.

Ingredients

1½ tbsp olive oil
1 smallish brown onion, finely diced
2 cloves garlic, finely diced
1½ tsp ground cumin
3/4 tsp ground coriander
small pinch chilli flakes or large pinch cayenne pepper
¼ tsp ground allspice
500g minced lamb or use diced lamb if you have a mincer
2 tbsp mint leaves
2 tbsp parsley leaves
1 egg
½ tsp salt
70-100g fetta, crumbled
1/3 cup brown rice cooked for 33 minutes in plenty of salted water (or ½ cup fresh bread crumbs)

Lamb fetta 1   Lamb fetta 2

Method

  1. Heat olive oil in a pan over medium heat. Saute onion and garlic for 6 to 7 minutes until soft but not coloured. Add spices and cook for 1 minute. Remove from heat and allow to cool.
  2. If you have a mincer, just put the lamb and herbs through the mincer together. If not, chop the herbs finely and mix with the lamb mince and cooled onion in a bowl. Add egg, salt, fetta and bread crumbs or rice and mix well.
  3. Divide the lamb mix into about 15 portions and, using oiled hands, mould into croquettes.
  4. Cook gently in a frypan with olive oil, turning once or twice to ensure even cooking.

Lamb fetta 3  Potatoes stuffed 1

For the stuffed potatoes, I pricked the skin of each potato thoroughly with a fork – to prevent a premature eruption of potato flesh – and boiled them gently for about 25 minutes (must be no longer than when the skin just begins to peel). When they were cool enough to handle – don’t use cold water, let them continue to cook in their own skins – Maggie sliced off a thin top layer, scooped out most of the flesh and mashed it with some butter, sour cream, salt, black pepper, paprika and plenty of finely chopped parsley and chives that I picked from our garden.

We put the potatoes in the Weber as we lit it and gave them a 10-minute head-start after the temperature reached 180C.

Potatoes stuffed 2   Lamb fetta 4

Posted in Cooking | Tagged , , , | Leave a comment

Christmas Day food in a few words

We are almost one week into 2015, so, before my palate memories fade, here is a brief review of the elongated Christmas Day lunch Maggie and I shared with friends who live a few doors up from us. You can view the photos here.

For starters, our friend Janet prepared a Japanese-style noodle salad with pan-fried sesame-crusted salmon and a wasabi-flavoured dressing. It was refreshing and delicate, followed by the wasabi kick! Before, during and after this plate, we shared one of the bottles of Prosecco we brought back from our visit to the King Valley.

The second course was beef carpaccio, dressed with rocket, lemon juice, olive oil, salt & pepper and shaved Italian parmesan. Maggie had found a youtube video from London’s famous River Cafe that showed you how to make beef carpaccio from scratch and we followed it faithfully except for reducing the volume of lemon juice. This is a dish that we will add to our collection of favourite recipes and make a few more times in 2015.

As foreshadowed in a pre-Christmas post, the next course was chargrilled spatchcock and peaches. With fresh spatchcock purchased from Cesters and the pick of this season’s outstanding crop of yellow peaches from Toscano’s, we could hardly have failed. And we didn’t! A bottle of viognier purchased from Paringa Estate a few months back was a perfect partner for this dish.

Last but not in anyway least, was a modest serve each of Janet’s lemon tart with fresh raspberries and lime & coconut ice-cream. We dine with Janet and Gary at our respective homes several times each year and, by a unanimous decision, Janet takes responsibility for most of the desserts, usually featuring an exotic homemade ice-cream.

Then, while the dishwasher whirred away, we watched the special Christmas edition of the Vicar of Dibley. What a perfect day; even Melbourne’s fickle weather came to the party with a blue sky, light winds and 23C. And, you know what, it is only 353 sleeps ’til our next Christmas Day feast!

Posted in Cooking | Tagged , , , | Leave a comment